Find Out How Many Coats of Touch Up Paint on a Car
Knowing how many coats of touch up paint on a car to apply is the secret to a seamless repair. Too few coats leave the chip exposed to rust, while too many create a thick, ugly blob. This guide shows you the exact number of layers for brush-on pens, spray cans, and combo methods. You’ll also learn the three-part paint system and how to avoid common mistakes. By the end, you’ll confidently fix any paint chip like a pro.
If you’ve ever found a paint chip on your hood, you’ve probably wondered how many coats of touch up paint on a car will actually fix it. The answer isn’t a single magic number. It depends on the type of paint, the depth of the damage, and the method you use. Applying too few coats leaves the metal exposed to moisture and rust. Applying too many can cause peeling, bubbling, and an unsightly buildup. This guide breaks down the exact number of coats you need for every touch up paint method. You’ll learn the three-part paint system, step-by-step techniques, and expert tips to make the repair last for years.
A small chip might seem harmless. But a tiny crack in your paint is an open door for water, salt, and dirt. Over time, that moisture causes rust that spreads fast. Touch up paint seals the damage and stops corrosion in its tracks. The key is getting the layers right. Whether you use a pen, a spray can, or a brush, the principle is the same. You build up thin, even coats that blend with the factory paint. Let’s dive into why the number of coats matters so much.
Key Takeaways
- Two to three thin coats are usually enough for brush-on touch up pens and spray cans, depending on the chip depth.
- Always apply primer first if the damage reaches the bare metal to prevent rust.
- Let each coat dry completely before adding the next, usually 15 to 30 minutes.
- Finish with a clear coat to protect the repair and match the original shine.
- Wet sanding and polishing after the final coat creates a flawless, invisible finish.
- Color matching is critical—use your VIN or paint code to find the exact shade.
- Less is more—thin, even layers beat thick, gloopy ones every time.
📑 Table of Contents
- Why the Number of Coats Matters for Your Car
- The Three-Part Paint System: Primer, Base Coat, and Clear Coat
- Step-by-Step: How Many Coats of Touch Up Paint on a Car for Each Method
- Factors That Change How Many Coats You Need
- Common Mistakes That Ruin Touch Up Paint Jobs
- Quick Tips for Touch Up Paint Success
- Expert Tips for a Flawless, Long-Lasting Repair
- Key Takeaways for Your Next Paint Repair
Why the Number of Coats Matters for Your Car
The paint on your car isn’t just one layer. It’s a carefully engineered system designed to protect the metal and look great. When you repair a chip, you’re recreating that system in miniature. Each layer has a specific job. Skipping a layer or adding too many ruins the balance. Understanding this makes it easy to answer how many coats of touch up paint on a car you actually need.
Think of it like building a sandwich. The primer is the bottom bread. It grips the metal and stops moisture from seeping in. The base coat is the filling. It gives your car its color. The clear coat is the top bread. It locks everything in and adds shine. If you miss a layer, the sandwich falls apart. If you add too much filling, it squishes out the sides. Balance is everything in automotive paint repair.
The Role of Each Paint Layer
Modern automotive paint has three main parts. The primer sits directly on the bare metal. It adheres to the surface and prevents rust. The base coat is the colored paint you see. It gives your car its unique shade. The clear coat sits on top of the base coat. It provides a glossy, protective shell. When you touch up a chip, you need to replicate these layers in the right order. A brush-on pen often combines the base coat and clear coat in one product. Spray cans usually sell primer, base coat, and clear coat separately. Knowing this helps you decide how many coats to apply at each stage.
What Happens If You Apply Too Few Coats
Too few coats leave gaps in your protection. The primer might not fully cover the bare metal, inviting rust. The base coat might look thin and transparent. The clear coat won’t bond properly, so the repair chips away quickly. You’ll end up with a visible bump or a dull spot that attracts dirt. In short, under-coating turns a small repair into a bigger problem. Always aim for complete coverage without overdoing it.
What Happens If You Apply Too Many Coats
Thick layers trap solvents underneath. As the paint dries, those solvents escape and create tiny bubbles. The repair becomes rough and uneven. Thick paint also shrinks as it cures, which can cause cracking. On a car, an over-layered touch up spot stands out like a sore thumb. It’s much harder to blend with the surrounding paint. Less is definitely more when it comes to touch up paint application.
The Three-Part Paint System: Primer, Base Coat, and Clear Coat
Before you grab a can or a pen, you need to understand the three-part system. This knowledge makes the whole process simpler. You’ll know exactly what each layer does and how many coats to apply.
How Touch Up Paint Differs from a Full Respray
A full respray involves spraying the entire panel with primer, base coat, and clear coat in a controlled environment. Touch up paint is a localized repair. You’re working on a small area, often with a brush or pen instead of a spray gun. Because the area is tiny, you can’t apply the same thick, wet coats you’d use on a full panel. Thin, controlled layers are essential for a natural-looking result. This is why knowing how many coats of touch up paint on a car to use is so important.
Full resprays use heavy equipment and climate-controlled booths. A DIY repair happens in your driveway or garage. The paint chemistry is the same, but the application is different. You must be more precise with a small brush or pen. That’s why thin, even coats win every time.
Step-by-Step: How Many Coats of Touch Up Paint on a Car for Each Method
The number of coats varies by product. Here’s a detailed breakdown for the most common touch up methods. I’ll include a quick comparison table so you can pick the right approach.
Brush-On Touch Up Pens
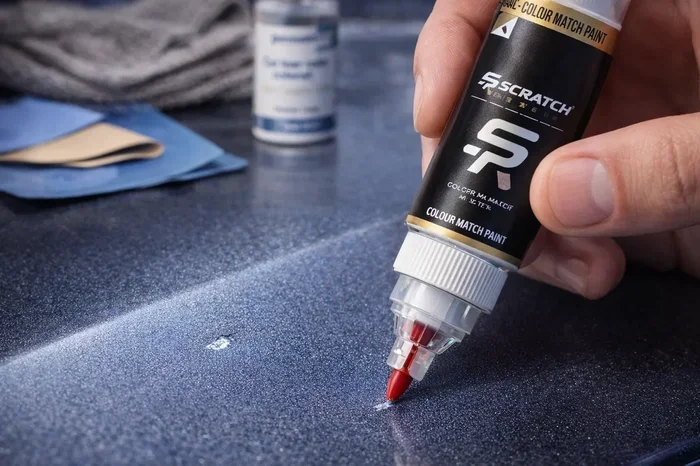
Touch up pens are the easiest option for small chips. They come with a tiny brush that dispenses paint directly into the crater. Most pens combine the base coat and clear coat in one bottle. For these, you typically apply two to three thin coats. Wait 15 minutes between coats. Let the final coat cure for 24 hours before buffing. The pen’s brush can be tricky to control. Apply slowly and let the paint flow into the chip. Don’t flood the area. A steady hand gives the best results.
Quick tip: Dip only the tip of the brush into the paint. Wipe off the excess on the bottle’s rim. A small dot of paint goes a long way. You can always add another coat if needed.
Spray Can Touch Up Paint
Spray cans offer more coverage and a smoother finish. They usually come in a two-step system: primer and paint, or paint and clear coat. For primer, one thin coat is enough if you’re covering bare metal. For the base color, apply two to three light mist coats. Hold the can 10 to 12 inches away. Use sweeping motions, not a fixed stream. Then, apply one to two coats of clear coat. Each clear coat layer should be very light. The goal is a glossy, protective shell without runs. Spray cans are great for larger chips or scratches that need a more durable fix.
Expert insight: Spray cans work best in temperatures between 50°F and 80°F. Cold paint doesn’t flow well, and hot paint dries too fast. Work in a shaded area for the best results.
Brush and Clear Coat Combo
This method gives you the most control. You apply the base coat with a fine brush, then seal it with a separate clear coat. For the base coat, two thin strokes are usually sufficient. Let it dry for 20 minutes. Then, apply two to three ultra-thin clear coat layers. Wait 10 minutes between each clear coat layer. This combo works well for deep chips that need precise color matching. It takes a bit more patience, but the result is often indistinguishable from the factory paint.
| Method | Base Coat Layers | Clear Coat Layers | Primer Needed? | Best For |
|---|---|---|---|---|
| Brush-On Pen | 2-3 thin coats | Built-in (1 product) | Only if bare metal | Small chips, quick fixes |
| Spray Can | 2-3 light mist coats | 1-2 light coats | Yes, for bare metal | Medium chips, larger areas |
| Brush + Clear Coat | 2 thin strokes | 2-3 ultra-thin coats | Yes, for bare metal | Deep chips, precise color match |
Factors That Change How Many Coats You Need
Not every repair is the same. Several factors influence the exact number of coats you’ll need. Keeping these in mind helps you adjust on the fly.
Size and Depth of the Damage
A shallow surface scratch might only need one coat of paint. A deep chip that exposes bare metal requires primer, multiple base coats, and clear coat. The deeper the damage, the more layers you need to build up a smooth, protective surface. Always clean the area first and remove any loose paint. Then, assess the depth. If you see silver or bare metal, primer is a must.
Use a paint depth gauge if you have one. It measures the remaining paint thickness. This tells you how much paint is left and whether the chip has reached the primer or metal. A gauge helps you decide if you need an extra base coat for full coverage.
Age and Condition of Your Car’s Paint
Older cars often have single-stage paint, where the color and clear coat are combined. Newer cars use a two-stage system with a separate clear coat. For single-stage paint, you might only need one or two coats of color. For two-stage paint, you must apply a clear coat on top of the base color. Check your car’s year and paint type before you start. The owner’s manual or a dealer can confirm this.
Cars that have been in the sun for years may have oxidized paint. The surface becomes chalky and dull. In this case, you might need an extra base coat to compensate for the faded original color. Always clean the area with a mild solvent before painting to remove oxidation.
Weather and Storage Conditions
Cars parked outdoors face more UV exposure, rain, and temperature swings. This can make the existing paint more brittle. In harsh climates, a slightly extra clear coat layer adds protection. Humidity also affects drying times. In humid conditions, each coat takes longer to dry. Let extra time between layers to avoid moisture trapping under the paint.
Common Mistakes That Ruin Touch Up Paint Jobs
Even with the right number of coats, mistakes can ruin your repair. Here are the most common errors and how to avoid them.
Skipping the Primer
Primer is not optional when the chip reaches bare metal. Some pens and paints claim to work without primer, but they don’t last long. Primer creates a bonding surface for the paint. Without it, the touch up paint peels off within weeks. Always apply a thin layer of primer if you see any exposed metal. Let it dry for 30 minutes before adding color.
Applying Coats Too Thick
It’s tempting to glob on the paint to cover the chip quickly. Thick coats trap solvents and cause bubbling. They also shrink as they cure, creating a concave dip in the repair. Instead, apply many thin layers. Each layer should be almost transparent. Build up gradually until the chip is just below the surrounding paint level. This takes patience, but it’s the secret to an invisible fix.
Not Letting Each Coat Dry Completely
Rushing between coats is a recipe for disaster. If you apply the next layer while the previous one is still tacky, the solvents mix and create a sticky, uneven surface. Follow the drying times on the product label. Usually, 15 to 30 minutes is enough for thin coats in warm, dry weather. In cool or humid conditions, wait longer. A fully dry surface ensures each new layer bonds properly.
Quick Tips for Touch Up Paint Success
Here are some fast, practical tips to make your repair easier and look better:
- Clean the chip first. Use a mild wax and grease remover. Any dirt or oil will prevent the paint from sticking.
- Tape off the area. Use painter’s tape around the chip to protect the surrounding paint from accidental drips.
- Shake the bottle well. Touch up paint pigments settle at the bottom. Shake for 30 seconds before each use.
- Work in thin layers. It’s better to do four thin coats than two thick ones. Thin coats dry faster and look smoother.
- Keep a damp cloth nearby. Wipe away any drips immediately before they harden.
- Use a toothpick for tiny chips. Dip the toothpick in paint and gently fill the crater. It gives you more control than a brush.
Expert Tips for a Flawless, Long-Lasting Repair
Once you’ve applied the right number of coats, a few finishing steps make the repair truly professional. These tips come from years of automotive paint correction experience.
Buffing and Polishing After the Final Coat
After the clear coat has fully cured (24 to 48 hours), you can level the repair with fine-grit wet sandpaper. Use 2000-grit or higher. Sand very lightly with water until the surface is flush with the surrounding paint. Then, apply a rubbing compound with a microfiber cloth. Buff in small circles until the shine matches the rest of the car. Finally, wax the area to protect the fresh paint. This process transforms a visible blob into a seamless finish.
Expert insight: A dual-action polisher on a low speed setting can help blend the repair. But for a small chip, hand-buffing is just as effective. Use a foam pad and a quality polishing compound. Work in a circular motion and check your progress often.
How to Match Your Car’s Color Perfectly
Color matching is one of the trickiest parts of touch up work. Every car’s paint fades differently over time. The original color code on your door jamb or VIN plate gives you the factory formula. Many touch up paint suppliers let you look up the code online. Always test the paint on a hidden spot first, like inside the trunk. Let it dry completely and compare it in natural sunlight. If the match isn’t perfect, you can blend the edges with a small brush and the existing paint.
Automotive paint codes can be tricky. Some manufacturers use the same color code across multiple years with slight formula changes. If you’re unsure, bring a chip sample to an auto parts store. They can mix a custom batch for you.
When to Call a Professional Instead
Touch up paint works great for small chips and scratches. But if the damage covers more than a few square inches, or if the paint is peeling in large sheets, a professional paint shop is better. They have spray booths, color matching computers, and the skills to blend large areas. For a single chip, DIY is easy and affordable. For widespread damage, investing in a pro prevents a worse outcome.
Key Takeaways for Your Next Paint Repair
Now you know the secrets to a successful touch up. Here’s a quick recap of what to remember:
- Two to three thin coats of base color are the sweet spot for most methods.
- Always use primer on bare metal to stop rust before it starts.
- Clear coat layers should be ultra-thin—one to two coats for spray cans, two to three for brush methods.
- Dry times matter—never rush the process. Let each layer set completely.
- Finish with wet sanding and polishing to blend the repair invisibly.
- Match your color code using the VIN or door jamb label for the best results.
- Thin, even layers beat thick, gloopy ones every single time.
So, the next time you spot a paint chip on your fender or hood, you’ll know exactly what to do. The answer to how many coats of touch up paint on a car is built on a simple principle: patience and thin layers. Take your time, protect the metal, and seal the repair with a clear coat. With the right approach, that tiny blemish will disappear completely. Your car will look fresh, protected, and ready for the road ahead.
Frequently Asked Questions
Can I apply touch up paint in direct sunlight?
It’s best to work in a shaded, cool area. Direct sunlight heats the paint too fast, causing it to dry unevenly and bubble. Find a garage or a spot under a tree for the best results.
How long should I wait before driving the car after a touch up?
Let the final clear coat cure for at least 24 hours before washing or driving. The paint is soft during this time. Full hardness develops over 48 to 72 hours, so be gentle with the repaired area for the first few days.
Do I need to sand the chip before applying touch up paint?
Yes, lightly sand the edges of the chip with 600-grit sandpaper to remove loose paint and create a smooth edge. Wipe the area with a damp microfiber cloth to remove dust. This helps the new paint adhere properly.
What if my touch up paint doesn’t match perfectly?
Color fading makes an exact match hard. You can blend the edges by feathering the touch up paint into the surrounding original paint. A light layer of clear coat over the whole area helps the repair disappear into the existing finish.
Can I use a touch up pen on rust spots?
Only after you’ve removed all the rust and applied a rust converter or primer. Touch up paint alone will not stop rust from spreading. Treat the metal first, then apply the primer, base coat, and clear coat in the correct order.
How do I store touch up paint for future use?
Keep the bottle tightly sealed in a cool, dark place. Heat and sunlight break down the paint pigments. Store it in a garage or a closet, not in direct sun or a hot car. Shake the bottle gently before each use to mix the pigments.