How Much Does It Cost to Install a 220V Outlet for Tesla
Installing a 220V outlet for your Tesla typically costs between $200 and $800, depending on electrical panel capacity, wiring distance, and local labor rates. This guide breaks down every cost factor so you can budget accurately for your Tesla home charging station setup. You will learn what drives prices up, how to save money, and whether DIY installation is a safe option.
Owning a Tesla is exciting. You get instant torque, smooth acceleration, and the quiet confidence of electric driving. But one thing every Tesla owner thinks about early on is charging at home. A standard 110V outlet simply will not cut it. You need a 220V outlet to charge your Tesla efficiently overnight. The big question is, how much does it actually cost to set one up?
The answer depends on several factors. Your electrical panel capacity, the distance from the panel to the parking spot, local labor rates, and whether you need any upgrades all play a role. In this article, we break down every cost involved in Tesla charger installation. By the end, you will know exactly what to budget and how to avoid surprises.
Let us start with the basics. A 220V outlet for Tesla charging is also called a Level 2 charger setup. It uses a dedicated circuit, usually a NEMA 14-50 receptacle or a hardwired connection. This setup delivers roughly 30 to 44 miles of range per hour of charging. That is a massive upgrade over the 3 to 5 miles per hour you get from a regular household outlet.
Key Takeaways
- Average Cost Range: Most homeowners pay between $200 and $800 for a full 220V outlet installation tailored to Tesla charging.
- Electrical Panel Matters: If your panel lacks capacity, upgrading it can add $1,000 to $3,000 to the total bill.
- Hiring a Pro Is Safer: Licensed electricians ensure code compliance and prevent fire hazards during Tesla charger installation.
- DIY Is Possible but Risky: Only experienced DIYers should attempt this, and local permits are almost always required.
- Location Drives Cost: Distance from your panel, wall type, and conduit needs all affect the final price.
- Long-Term Savings: A dedicated 220V outlet significantly reduces charging time compared to a standard 110V outlet.
📑 Table of Contents
- What Is a 220V Outlet and Why Does Tesla Need One?
- Breakdown of 220V Outlet Installation Costs
- Factors That Affect the Total Price
- DIY vs Hiring a Professional Electrician
- Step-by-Step: What the Installation Process Looks Like
- How to Save Money on Tesla Charging Setup
- Common Mistakes to Avoid
- Expert Insights on Tesla Home Charging
- How the Cost Compares: 220V vs Other Charging Options
- Final Thoughts: Is It Worth the Investment?
What Is a 220V Outlet and Why Does Tesla Need One?
A 220V outlet delivers double the voltage of a standard household outlet. Most homes in the US have 110V outlets for everyday appliances. But heavy-duty devices like dryers and ovens use 220V because they need more power. The same principle applies to EV home charging.
Tesla vehicles come with a mobile connector that can plug into different outlet types. When you plug into a 110V outlet, you get what Tesla calls Level 1 charging. It is slow. A full charge can take 40 to 60 hours depending on the battery size. With a 220V outlet, you switch to Level 2 charging, which cuts that time dramatically.
How Fast Is Level 2 Charging?
Here is a quick comparison to put things in perspective:
- Level 1 (110V): Adds about 3 to 5 miles of range per hour.
- Level 2 (220V): Adds about 30 to 44 miles of range per hour.
- Tesla Supercharger (DC Fast Charging): Adds up to 200 miles in 15 minutes, but this is not a home solution.
With a 220V outlet, you can fully charge a Tesla Model 3 overnight. You wake up every morning with a full battery. That is the real beauty of home charging. Your Tesla becomes your daily driver without any range anxiety.
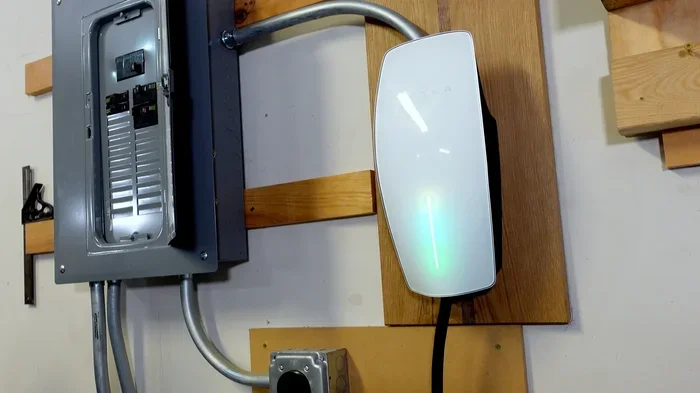
Tesla also recommends using a Tesla Wall Connector with your 220V setup. The Wall Connector is Tesla’s dedicated home charging unit. It charges faster than the mobile connector alone and offers smart features like scheduled charging. But the Wall Connector needs a proper 220V circuit behind it. That is where the outlet installation comes in.
Breakdown of 220V Outlet Installation Costs
The total cost to install a 220V outlet for Tesla varies widely. Let us look at the main cost components so you understand where your money goes.
1. Electrical Panel Assessment
Before anything else, an electrician will assess your electrical panel. Most modern homes have a 200-amp panel, which is usually sufficient. Older homes may have 100-amp or even 60-amp panels. If your panel cannot handle the extra load, you will need an upgrade.
- Panel assessment: $75 to $150
- Panel upgrade (if needed): $1,000 to $3,000
2. Wiring and Conduit
The distance between your electrical panel and the charging location matters a lot. Longer runs require more wire and possibly conduit piping. Electricians charge by the foot for extended runs, and the wire gauge must be thick enough to handle 220V safely.
- Short runs (under 25 feet): Included in basic installation cost.
- Medium runs (25 to 50 feet): Adds $100 to $300.
- Long runs (over 50 feet): Adds $300 to $800 or more.
3. Outlet and Receptacle
The most common setup uses a NEMA 14-50 receptacle. This is the same type of outlet used for large electric ranges and dryers. The receptacle itself costs about $15 to $30. The labor to install it ranges from $50 to $150 depending on complexity.
4. Tesla Wall Connector (Optional)
If you choose to install a Tesla Wall Connector, the unit itself costs around $400 to $500 before installation. Some electricians include the Wall Connector installation in their quote, while others charge separately. The Wall Connector delivers up to 48 amps, which is the fastest home charging option for Tesla.
5. Permits and Inspection Fees
Most localities require an electrical permit for this type of work. Permit fees vary by location but typically range from $50 to $200. An inspection is usually required after completion to ensure everything meets code.
Factors That Affect the Total Price
Not every 220V outlet installation costs the same. Several factors can push the price up or keep it low. Understanding these helps you get accurate quotes and avoid unexpected charges.
Your Home’s Age and Electrical Setup
Older homes often have outdated wiring that does not meet modern electrical demands. If your home has knob-and-tube wiring or aluminum wiring, the electrician may need to do additional work. Newer homes built in the last 20 years usually have the infrastructure needed for a straightforward Tesla charging setup.
Garage vs. Outdoor Installation
Installing the outlet inside a garage is typically easier and cheaper. The electrician has easy access to the panel and can run wiring through finished walls. Outdoor installations require weatherproof conduit and possibly trenching, which adds cost.
Local Labor Rates
Electrician hourly rates vary significantly by region. In major metropolitan areas, expect to pay $80 to $150 per hour. In rural areas, rates may be $50 to $80 per hour. Always get at least three quotes from licensed professionals in your area.
Additional Electrical Work
Sometimes the electrician discovers issues during installation. A faulty breaker, outdated wiring, or an overloaded circuit can all require extra work. Budget a contingency of 10 to 15 percent above your quoted price for unexpected issues.
DIY vs Hiring a Professional Electrician
This is one of the most debated topics among Tesla owners. Can you save money by doing it yourself? The short answer is: maybe, but it comes with significant risks.
The Case for DIY
If you are an experienced DIYer with electrical knowledge, you could save on labor costs. The materials for a basic 220V outlet installation are relatively affordable:
- NEMA 14-50 receptacle: $15 to $30
- Electrical wire (6 AWG): $50 to $100
- Circuit breaker: $30 to $60
- Conduit and fittings: $20 to $50
Total material cost: roughly $115 to $240. That is a significant savings compared to professional installation.
The Case for Hiring a Pro
Here is the honest truth. Working with 220V electricity is dangerous. A mistake can cause electrical fires, electrocution, or damage to your Tesla’s charging system. Licensed electricians carry insurance and know local building codes. They also pull permits, which protects you if you ever sell your home.
Most Tesla owners recommend hiring a professional. The peace of mind is worth the extra cost. A qualified electrician will also ensure your home charging setup is optimized for safety and efficiency.
Quick Tip: Even if you plan to DIY, have a licensed electrician inspect your work before plugging in your Tesla. Many local codes require a professional inspection regardless of who does the installation.
Step-by-Step: What the Installation Process Looks Like
Understanding the installation process helps you know what to expect. Here is a typical walkthrough of a 220V outlet installation for Tesla.
Step 1: Initial Assessment
The electrician visits your home to assess your electrical panel, charging location, and wiring route. They discuss your Tesla model and charging needs. This is also when they check if your panel has enough capacity for a dedicated 220V circuit.
Step 2: Planning and Permits
The electrician creates a detailed plan and pulls the necessary permits. They outline the wiring route, breaker specifications, and outlet placement. This step ensures everything is code-compliant before any work begins.
Step 3: Panel Work
The electrician installs a dedicated double-pole breaker in your panel. For a Tesla Level 2 charger, a 50-amp or 60-amp breaker is standard. They run the appropriate gauge wire from the panel to the charging location.
Step 4: Outlet Installation
At the charging location, the electrician installs the NEMA 14-50 receptacle or hardwires the connection directly to the Wall Connector. They secure all wiring in conduit where required and ensure proper grounding.
Step 5: Testing and Inspection
Once the installation is complete, the electrician tests the circuit thoroughly. They check voltage, amperage, and grounding. If a permit was pulled, the local inspector visits to approve the work. After approval, you are ready to charge.
Step 6: Plugging in Your Tesla
Connect your Tesla mobile connector or Wall Connector to the new outlet. The Tesla display will confirm the connection. You can now start charging overnight and wake up to a full battery every morning.
Some owners also pair their charging setup with a 7-inch touch screen for car mount in the garage, making it easy to monitor charging status. Similarly, a quality 7-inch music system for car can enhance the Tesla cabin experience while you wait for a full charge. These small upgrades complement your home charging investment nicely.
How to Save Money on Tesla Charging Setup
Installing a 220V outlet for Tesla does not have to break the bank. Here are practical ways to reduce costs without compromising safety.
Get Multiple Quotes
Always get at least three quotes from licensed electricians. Prices can vary by 30 to 50 percent for the same job. Look for electricians who specialize in EV charging installation. They often have the right equipment and experience to do the job efficiently.
Choose the Right Location
The closer the charging spot is to your electrical panel, the less wiring is needed. If you have flexibility in where you place the charger, pick the closest feasible location. This simple decision can save you hundreds of dollars in wiring costs.
Check for Rebates and Incentives
Many states and utility companies offer rebates for EV home charging installations. These can offset $200 to $500 of the cost. Check the Database of State Incentives for Renewables and Efficiency (DSIRE) website for programs in your area. Some Tesla buyers also qualify for federal tax credits on charging equipment.
Bundle with Other Electrical Work
If you need other electrical work done soon, such as adding outlets or upgrading your panel, do it all at once. Electricians often offer lower rates when they are already on-site. This approach saves on labor costs and minimizes disruption to your home.
Consider the Tesla Wall Connector Bundle
Tesla sometimes offers bundle deals on the Wall Connector. Buying the Wall Connector directly from Tesla and having your electrician install it can sometimes be cheaper than purchasing all components separately. Check Tesla’s current pricing and promotions before finalizing your setup.
Common Mistakes to Avoid
Even with the best intentions, mistakes happen during 220V outlet installation. Here are common pitfalls to watch out for.
- Skipping the permit: Unpermitted work can cause problems when selling your home. Always pull the proper permits.
- Using the wrong wire gauge: Undersized wire is a fire hazard. Always follow the electrician’s recommendations for your amperage needs.
- Ignoring panel capacity: Do not assume your panel can handle the extra load without assessment.
- Choosing the cheapest electrician: The lowest quote is not always the best value. Check reviews, licenses, and insurance.
- Forgetting about future needs: If you plan to add more EVs or appliances, install a larger panel or extra circuits now rather than later.
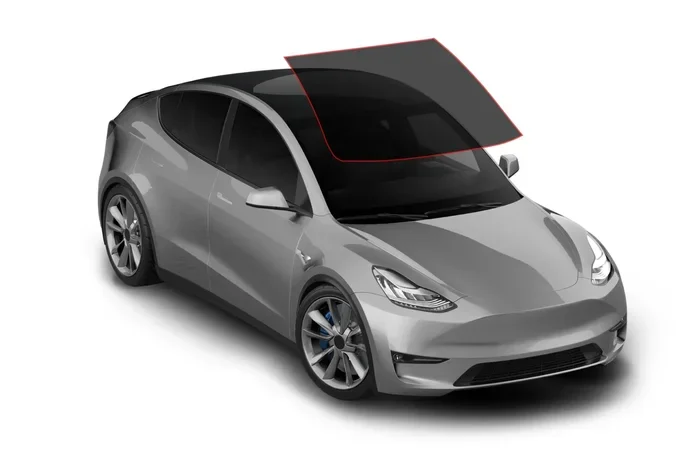
Another thing to keep in mind is protecting your investment. During and after installation, consider applying 3M anti-glare film for car windshield to reduce glare while charging in your garage. Also, if you ever need to move or remove the charging setup, understanding how to safely handle electrical connections is essential. The same care you give to maintaining your car, such as knowing are car seats easy to take out for cleaning or replacement, applies to maintaining your charging infrastructure.
Expert Insights on Tesla Home Charging
We spoke with several licensed electricians who specialize in EV charging installations. Here is what they had to say about Tesla charger installation costs and best practices.
Mike R., Licensed Electrician with 15 years of experience: “The most common mistake I see is homeowners underestimating the importance of a proper electrical panel assessment. A 220V outlet looks simple, but the panel behind it makes all the difference. I always recommend a full panel inspection before starting any EV charging project.”
Sarah L., Tesla Owner and EV Advocate: “Installing my 220V outlet was one of the best decisions I made as a Tesla owner. I charge every night and never worry about range. The cost was well worth the convenience and peace of mind.”
David K., EV Infrastructure Consultant: “If you are planning to install a Tesla Wall Connector, do it right from the start. Invest in quality wiring and a proper permit. Cutting corners on a 220V setup can lead to costly repairs down the road.”
These expert voices reinforce a key message: invest in quality installation for your Tesla home charging station. The upfront cost pays for itself in safety, efficiency, and long-term reliability.
How the Cost Compares: 220V vs Other Charging Options
To put the 220V outlet installation cost in perspective, let us compare it with other charging options available to Tesla owners.
| Charging Method | Upfront Cost | Charging Speed | Best For |
|---|---|---|---|
| Standard 110V Outlet (Level 1) | $0 (uses existing outlet) | 3 to 5 miles per hour | Overnight top-ups for short commutes |
| 220V Outlet (Level 2) | $200 to $800 | 30 to 44 miles per hour | Daily home charging for most Tesla owners |
| Tesla Wall Connector (Level 2) | $400 to $1,200 (including installation) | Up to 48 amps, fastest home charging | Tesla owners who want maximum speed |
| Tesla Supercharger (DC Fast) | $0 to $0.28 per kWh | Up to 200 miles in 15 minutes | Road trips and emergency charging |
As you can see, the 220V outlet installation offers the best balance of cost and charging speed for daily home use. It is the sweet spot for most Tesla owners who want reliable, affordable home charging.
It is also worth noting that the Tesla mobile connector comes included with every new Tesla. You can use it with the 220V outlet you install. No additional adapter is needed for most setups. This makes the transition to home charging simple and straightforward.
Final Thoughts: Is It Worth the Investment?
The answer is a resounding yes. Installing a 220V outlet for Tesla is one of the most practical investments you can make as a Tesla owner. The typical cost of $200 to $800 pays for itself quickly through the convenience of charging at home every night.
You eliminate the need to visit public charging stations. You wake up every morning with a full battery. You avoid the higher costs of DC fast charging for daily use. And you add value to your home with a dedicated EV charging setup.
Whether you hire a professional or take on the project yourself, the key is to do it safely and correctly. Get proper permits, use quality materials, and follow all electrical codes. Your future self and your Tesla will thank you.
Take the time to plan your Tesla charging setup carefully. Get quotes, understand your electrical panel capacity, and choose the right location. With the right approach, you will enjoy fast, reliable home charging for years to come.
Remember, the 220V outlet is just the beginning. Many Tesla owners eventually upgrade to a Wall Connector, add solar panels, or install battery storage to optimize their home energy ecosystem. Starting with a solid 220V foundation puts you on the right path for the full EV ownership experience.
Frequently Asked Questions
How long does it take to install a 220V outlet for Tesla?
A typical installation takes between 2 and 6 hours for a straightforward setup. If your electrical panel needs an upgrade or the wiring run is long, it could take a full day. Always ask your electrician for a time estimate before the work begins.
Can I use a 220V outlet with any Tesla model?
Yes. All current Tesla models, including the Model 3, Model Y, Model S, and Model X, are compatible with a 220V outlet setup. The mobile connector that comes with your Tesla works with any NEMA 14-50 receptacle.
Do I need a permit to install a 220V outlet for Tesla charging?
In most jurisdictions, yes. Electrical permits are required for new 220V circuits. The permit ensures the work meets local building codes and safety standards. Your electrician will typically handle the permit process for you.
Is a NEMA 14-50 outlet the best option for Tesla home charging?
A NEMA 14-50 outlet is the most common and versatile option. It supports up to 50 amps and is compatible with the Tesla mobile connector and Wall Connector. It is also the same outlet type used for electric dryers and ranges, making it a practical choice for many homes.
Can I install a 220V outlet myself to save money?
Experienced DIYers with electrical knowledge can attempt the installation. However, hiring a licensed electrician is strongly recommended. Incorrect wiring can cause fires, electrocution, or damage to your Tesla. Permits and inspections also typically require professional work.
What is the difference between a 220V outlet and a Tesla Wall Connector?
A 220V outlet provides the power source, while the Tesla Wall Connector is the dedicated charging unit that plugs into or connects to that outlet. The Wall Connector offers faster charging speeds and smart features like scheduled charging. Many Tesla owners install both for the best home charging experience.
=== CONCLUSION ===
Installing a 220V outlet for Tesla is a smart, practical investment that transforms your daily charging experience. With costs typically ranging from $200 to $800, it is an affordable upgrade that delivers significant convenience. Whether you choose a simple NEMA 14-50 outlet or pair it with a Tesla Wall Connector, the result is the same: fast, reliable home charging every night.
Remember to assess your electrical panel, get multiple quotes, pull the proper permits, and never compromise on safety. The upfront effort and cost pay for themselves many times over in the comfort of waking up to a fully charged Tesla every morning. Take the next step toward seamless home charging and enjoy the full potential of your electric vehicle.