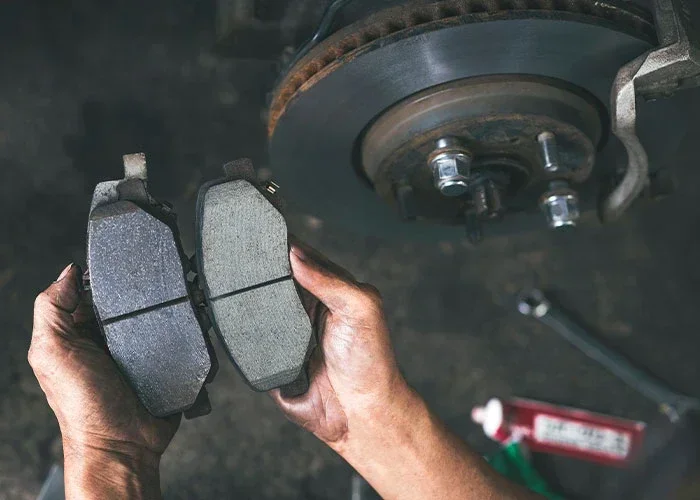
Can I Change the Brake Pads Myself Without a Mechanic
Yes, you can change brake pads yourself without a mechanic if you have the right tools and a little patience. This guide walks you through every step of DIY brake pad replacement, from gathering your tools to bleeding the brakes. You will learn how much you can save, what mistakes to avoid, and when it is smarter to let a professional handle the job.
Changing your own brake pads is one of the most satisfying car maintenance DIY projects you can tackle. It saves money, builds your confidence, and gives you a deeper understanding of how your vehicle works. Many car owners wonder whether they can handle this job at home instead of paying a shop to do it.
The short answer is yes, you can change brake pads yourself without a mechanic. Thousands of people do it every weekend in their driveways and garages. But it is not just about swapping parts. You need the right tools, the correct brake pad types, and a solid understanding of brake safety. This guide covers everything you need to know to get the job done right the first time.
Brake pads are a critical part of your vehicle’s stopping power. When they wear down, your brakes squeal, grind, or feel spongy. Ignoring worn pads is dangerous and can damage your brake rotor and caliper. Whether you are saving money or simply enjoy working on your car, learning how to replace brake pads is a valuable skill. Let us walk through the entire process together.
Key Takeaways
- DIY Brake Pad Replacement Is Doable: Most people with basic mechanical skills can swap out brake pads at home with common tools.
- You Will Need the Right Tools: A jack, jack stands, lug wrench, torque wrench, and brake cleaner are essential for a safe job.
- Cost Savings Are Real: Doing it yourself can save you $100 to $300 per axle compared to shop labor costs.
- Safety Comes First: Always work on a flat surface, use jack stands, and never rely on a jack alone.
- Know When to Call a Pro: If your brake rotors are warped or your brake lines are damaged, a mechanic is the safer choice.
- Brake Pad Types Matter: Ceramic, semi-metallic, and organic pads each have different performance and noise characteristics.
- Post-Replacement Checks Are Crucial: Test your brakes in a safe area before driving on public roads.
📑 Table of Contents
- Why People Choose to Change Brake Pads Themselves
- Tools and Materials You Will Need
- Step-by-Step Brake Pad Replacement Guide
- Common Mistakes to Avoid
- Comparison Table: DIY vs. Professional Brake Pad Replacement
- When to Call a Mechanic Instead
- How Much Can You Save by Doing It Yourself?
- Brake Pad Types: Which One Should You Choose?
- Final Thoughts
Why People Choose to Change Brake Pads Themselves
There are many reasons car owners decide to do their own brake pad replacement. Understanding your motivation can help you stay focused and get the best results.
Saving Money on Brake Pad Cost
The biggest draw is cost savings. A typical brake pad replacement at a shop costs between $150 and $300 per axle. That includes parts and labor. When you buy the pads yourself, you only pay for the materials. Quality ceramic brake pads cost around $40 to $80 per axle. Semi-metallic pads run a similar price. That means you can save $100 or more per axle by doing it yourself.
Learning More About Your Vehicle
Working on your brakes teaches you how your car’s stopping system works. You learn about the brake caliper, brake rotor, brake fluid, and brake pad sensor. This knowledge helps you spot problems early. It also makes you a smarter car owner who can talk confidently with mechanics when repairs are needed.
Convenience and Flexibility
You set your own schedule. No waiting for an appointment. No dropping your car off and picking it up later. You can start the project on a Saturday morning and finish by early afternoon. For many people, this convenience alone makes DIY brake pad replacement worth it.
Tools and Materials You Will Need
Before you start, gather everything you need. Having the right brake pad tools makes the job faster and safer. Here is a complete list:
Essential Tools
- Jack and jack stands — Never work under a car supported only by a jack. Jack stands keep you safe.
- Lug wrench — For removing and tightening wheel lug nuts.
- C-clamp or brake caliper tool — To compress the caliper piston back into the bore.
- Torque wrench — Essential for tightening lug nuts and caliper bolts to the correct specs.
- Brake cleaner spray — Cleans off rust and grime from brake components.
- Socket set and ratchet — For removing caliper bolts and bracket hardware.
- Flathead and Phillips screwdrivers — For prying clips and removing old pads.
- Brake grease — Lubricates contact points and reduces noise.
Materials
- New brake pads (ceramic or semi-metallic)
- Brake fluid (check your owner’s manual for the correct type)
- Brake pad wear indicator clips (if needed)
- Wire brush for cleaning
- Disposable gloves and safety glasses
Quick Tip
Check your brake pad thickness before you buy new pads. Most pads have a wear indicator slot. If the slot is gone or the pad material is less than a quarter-inch thick, it is time for a replacement. You can also check through the wheel spokes for a visual inspection.
Step-by-Step Brake Pad Replacement Guide
Now for the hands-on part. Follow these steps carefully and you will have brand-new brake pads in under an hour per axle.
Step 1: Loosen the Lug Nuts
Before you jack up the car, loosen the lug nuts while the tire is still on the ground. Use your lug wrench and turn counterclockwise. Do not remove them completely yet. Just break the torque. This prevents the wheel from spinning when you lift the car.
Step 2: Jack Up the Vehicle
Place your jack under the vehicle’s designated jack point. Lift the car until the tire is about six inches off the ground. Then place jack stands under the frame or designated support points. Lower the car onto the stands. Give the car a firm shake to make sure it is stable before you put any weight on it.
Step 3: Remove the Wheel
Now fully remove the lug nuts and pull the wheel off. Set it aside. You will see the brake caliper, brake rotor, and brake pad clips. Take a moment to inspect everything before you start.
Step 4: Remove the Brake Caliper
Find the caliper bolts on the back of the caliper. Use your socket set to remove them. Gently pull the caliper up and away from the rotor. Do not let the caliper hang by the brake hose. Use a piece of wire or bungee cord to hang it from the suspension. This protects the brake line from damage.
Step 5: Remove the Old Brake Pads
Slide the old pads out of the caliper bracket. Note how they are positioned so you can install the new ones the same way. Check the brake pad wear indicator on the old pad. This tells you how worn they were and helps you understand what caused any noise or vibration.
Step 6: Compress the Caliper Piston
The new pads are thicker than the worn ones. You need to push the caliper piston back into the caliper bore. Use a c-clamp or a specialized brake caliper tool. Place the clamp on the piston and the back of the caliper. Turn slowly until the piston is fully seated. Be gentle — if you force it, you can damage the piston seal.
Step 7: Install the New Brake Pads
Slide the new pads into the caliper bracket. Make sure they sit flush and are properly aligned. Apply a thin layer of brake grease to the contact points where the pads touch the caliper and bracket. This reduces vibration and noise. Do not get grease on the friction surface of the pad — that will reduce braking power.
Step 8: Reinstall the Caliper
Place the caliper back over the new pads and onto the bracket. Insert and tighten the caliper bolts. Use your torque wrench to tighten them to the manufacturer’s specification. This is important — over-tightening can strip the threads, and under-tightening can cause the caliper to float improperly.
Step 9: Put the Wheel Back On
Slide the wheel back onto the hub. Hand-tighten the lug nuts in a star pattern. Lower the car off the jack stands. Then use your torque wrench to tighten the lug nuts to the proper spec. Tightening in a star pattern ensures even pressure on the rotor.
Step 10: Bleed the Brakes
This step is often overlooked but it is critical. After compressing the piston, air can get trapped in the brake lines. Pump the brake pedal several times before starting the engine. The pedal should feel firm. If it feels spongy, you need to bleed the brakes to remove the air. This can be done alone or with a helper. If you are not comfortable with brake bleeding, have a friend press the pedal while you open and close the bleed valve.
Expert Insight
Some people skip the brake bleeding step and drive away. This is a mistake. Air in the brake lines makes your pedal feel soft and reduces stopping power. Always check your pedal feel after replacing pads. If something feels off, do not drive the car until you fix it.
Common Mistakes to Avoid
Even experienced DIYers make errors during brake pad replacement. Here are the most common mistakes and how to avoid them.
Forgetting to Replace the Brake Pad Sensor
Many modern vehicles have a brake pad sensor built into the pad or the caliper. When the pad wears down, the sensor triggers a warning light on your dashboard. If your car has this sensor, replace it with the new pads. Reusing an old sensor can cause a false warning light or a failed brake inspection.
Not Cleaning the Caliper Bracket
Rust and debris build up on the caliper bracket over time. If you do not clean it with a wire brush and brake cleaner, the new pads may not slide properly. This causes uneven wear, noise, and reduced braking performance. Take five minutes to clean the bracket before installing new pads.
Over-Tightening or Under-Tightening Lug Nuts
Lug nuts must be tightened to the manufacturer’s torque specification. Over-tightening can warp the rotor or strip the studs. Under-tightening can cause the wheel to come loose while driving. Always use a torque wrench. Tighten in a star pattern for even pressure.
Using the Wrong Brake Pad Type
Not all brake pads are the same. Ceramic brake pads are quiet, clean, and gentle on rotors. They are a great choice for daily driving. Semi-metallic brake pads offer better stopping power and heat dissipation but can be noisier and produce more dust. Organic pads are the softest and quietest but wear out faster. Choose the type that matches your driving style and conditions.
Skipping the Brake Fluid Check
When you push the caliper piston back in, the brake fluid level in the reservoir rises. If the reservoir is already full, fluid can overflow onto painted surfaces. Check your fluid level before you start and top it off if needed. If fluid overflows, wipe it up immediately with a clean cloth.
Comparison Table: DIY vs. Professional Brake Pad Replacement
| Factor | DIY Replacement | Professional Shop |
|---|---|---|
| Cost (per axle) | $40 – $80 (parts only) | $150 – $300 (parts + labor) |
| Time Required | 30 – 60 minutes per axle | 1 – 2 hours (including wait time) |
| Tools Needed | Basic hand tools and jack stands | Shop provides everything |
| Skill Level | Beginner to intermediate | None required |
| Warranty on Work | None (unless you bring parts to shop) | Shop guarantees their labor |
| Learning Experience | High — you learn your car | None — you stay in the dark |
As you can see, DIY brake pad replacement offers significant savings and a great learning experience. The trade-off is the time and effort required. If you are not comfortable working under your car, a professional shop is always a valid choice.
When to Call a Mechanic Instead
Not every brake job should be done at home. Knowing your limits is part of brake safety. Here are situations where you should call a professional:
- Warped or scored brake rotors — If your rotor has deep grooves or is warped, you need to either resurface or replace it. This requires more advanced tools and knowledge.
- Brake fluid leaks — If you see fluid pooling near the caliper or brake lines, do not attempt a pad swap. A leak indicates a deeper problem that needs professional attention.
- Seized caliper slides — If the caliper slides are rusted or stuck, forcing them free can damage the caliper bracket. A mechanic has penetrating oils and specialized tools for this.
- ABS warning light is on — If your ABS light is illuminated, there may be an issue with the anti-lock brake system that requires diagnostic equipment.
- You are unsure about any step — There is no shame in calling a mechanic. Brakes are your most important safety system. If you have any doubt, get a professional opinion.
Remember, you can still drive your car after it overheats only if the issue is minor. But brakes are different — if something feels wrong with your braking, do not take chances. Have a professional inspect it. Similarly, if you notice warning lights like a traction control or stability light coming on, you should understand what driving with the trac off light on means for your safety before attempting any DIY work.
How Much Can You Save by Doing It Yourself?
The savings from DIY brake pad replacement are real and significant. Let us break it down:
- Parts cost: $40 to $80 per axle for quality pads
- Shop labor cost: $80 to $150 per axle
- Total savings per axle: $80 to $150
- Total savings for all four corners: $160 to $300
Over the life of a vehicle, you might replace brake pads three to five times. That means you could save $500 or more by doing the work yourself. The money you save can go toward better pads, new rotors, or even a fun road trip. Car maintenance DIY projects like this one pay for themselves quickly.
Keep in mind that you will also need to replace brake fluid periodically. Fresh brake fluid ensures your brakes feel firm and responsive. This is a small additional cost that makes a big difference in brake performance and safety.
Brake Pad Types: Which One Should You Choose?
Choosing the right brake pad type is just as important as the replacement process itself. Here is a quick look at your options:
Ceramic Brake Pads
Ceramic pads are made from a dense ceramic compound mixed with copper fibers. They produce minimal dust, operate quietly, and are gentle on rotors. They work well for daily driving and normal commuting. Ceramic pads have a longer brake pad lifespan than organic pads but cost a bit more.
Semi-Metallic Brake Pads
Semi-metallic pads contain metal shavings like steel, iron, and copper. They offer excellent stopping power and perform well in extreme temperatures. They are common in performance vehicles and trucks. The downside is they can be noisy and produce more brake dust.
Organic Brake Pads
Organic pads are made from non-metallic materials like rubber, glass, and resin. They are the quietest and gentlest on rotors. They are budget-friendly but wear out faster than ceramic or semi-metallic options. They work best for light-duty driving.
For most everyday drivers, ceramic pads offer the best balance of performance, noise, and longevity. If you tow heavy loads or drive in mountainous areas, semi-metallic pads may be a better fit.
Final Thoughts
Can I change the brake pads myself? Absolutely yes. With the right tools, a little mechanical knowledge, and about an hour of your time, you can replace your brake pads at home and save serious money. The process is straightforward, and the satisfaction of finishing a DIY brake job is hard to beat.
Start with the basics. Gather your tools, buy quality pads, and follow each step carefully. Do not skip the brake bleeding step. Always check your work before you drive. And remember, knowing when to call a mechanic is just as important as knowing how to do the work yourself.
If you are new to car maintenance, this is a perfect first project. It builds your confidence and teaches you valuable skills you will use for every future repair. Your brakes keep you and everyone on the road safe. Taking care of them yourself means you know exactly what is going into your car and that it was done right.
So grab your jack, your lug wrench, and your new brake pads. You have got this. Your car, your brakes, your savings — all in your hands.
Frequently Asked Questions
How long does it take to change brake pads yourself?
For most people, it takes about 30 to 60 minutes per axle. If it is your first time, give yourself a couple of hours to go through the steps carefully. With practice, you will get faster and more confident.
Can I drive my car after changing the brake pads myself?
Yes, but only after you have properly bled the brakes and tested the pedal feel in a safe area. Pump the brake pedal several times before starting the engine. Make sure the pedal feels firm. Then drive slowly at first to test the brakes before hitting normal speeds.
Do I need to bleed the brakes after replacing pads?
It depends. If you only pushed the caliper piston back in without opening any brake lines, you may not need to bleed them. However, if the pedal feels spongy, air has entered the system and you need to bleed the brakes. It is always better to be safe and do it.
What is the average brake pad replacement cost if I do it myself?
You will spend about $40 to $80 on parts per axle. That is compared to $150 to $300 at a shop. The savings come from eliminating labor charges. You also need basic tools, which you may already own if you keep a basic toolbox.
Can I reuse the old brake pad hardware?
It is best to replace the hardware. Clips, shims, and abutment bolts are inexpensive and ensure proper pad alignment and noise-free operation. Reusing old hardware can cause squealing, vibration, and uneven pad wear.
How do I know if my brake pads need to be replaced?
Look for signs like squealing or grinding noises, a vibrating brake pedal, or a brake pad warning light on your dashboard. You can also visually check pad thickness through the wheel spokes. If the pad material is less than a quarter-inch thick, it is time for replacement.
=== CONCLUSION ===
Changing your brake pads yourself without a mechanic is one of the most rewarding and practical DIY car maintenance projects you can do. It saves you real money, teaches you about your vehicle, and gives you confidence every time you get behind the wheel. With the right tools, quality brake pads, and a careful approach, you can complete this job in under an hour and drive away knowing your brakes are in excellent hands — yours.
Remember that brake safety always comes first. If anything feels uncertain during the process, do not hesitate to consult a professional. Your brakes are not something to take lightly. But for most car owners, this is a job well within reach. Start your project today and enjoy the satisfaction of a job done right.