Car Cleaning at Home Made Easy with These Simple Tips
Car cleaning at home is easier than most people think, and it can save you serious money while keeping your vehicle looking its best. With the right DIY car wash supplies, a little know-how, and a few simple techniques, you can achieve a professional-level detail right in your driveway. This guide covers everything from washing the exterior to deep cleaning the interior, so your whole car looks and smells amazing.
There is something deeply satisfying about stepping back and admiring a freshly cleaned car. Whether you are a daily driver or a weekend cruiser, car cleaning at home gives you control over how your vehicle looks and feels. You do not need a fancy garage or expensive equipment. A little time, the right products, and a willingness to get your hands a little dirty are all you need.
Many people assume a professional detail is the only way to get that showroom shine. But the truth is, washing your car at home can deliver incredible results when you know what you are doing. This guide walks you through every step of the process. You will learn what supplies to grab, how to wash the outside without leaving scratches, and how to tackle the interior so it smells fresh and looks clean. By the end, you will feel confident enough to make DIY car wash day a regular part of your routine.
Let us be real for a second. Your car takes a beating every day. Dust, bird droppings, tree sap, rain spots, and crumbs from your last road trip all pile up fast. Neglecting the buildup does more than just make your car look bad. It can actually damage the paint and interior materials over time. That is why learning how to clean a car properly at home is one of the smartest things you can do as a car owner. It protects your investment and keeps your ride looking great for years.
Key Takeaways
- Gather the right supplies first: Having quality microfiber cloths, car soap, and a good bucket system makes all the difference.
- Follow the two-bucket method: This simple technique prevents scratches and keeps your paint looking sharp.
- Clean from top to bottom: Working in sections ensures you don’t miss spots and avoid re-soiling cleaned areas.
- Don’t skip the interior: Vacuuming, wiping surfaces, and treating stains transforms the whole cabin experience.
- Avoid common mistakes: Using household cleaners, washing in direct sun, and skipping drying steps can damage your car.
- Regular maintenance matters: A quick wash every two weeks keeps buildup at bay and protects your paint long-term.
📑 Table of Contents
- Why Cleaning Your Car at Home Makes Sense
- Gathering the Right Car Cleaning Supplies
- Step-by-Step Guide to Washing the Exterior
- Deep Cleaning the Car Interior
- Protecting and Finishing Your Car
- Common Mistakes People Make When Washing at Home
- How Often Should You Clean Your Car at Home?
- Final Thoughts
Why Cleaning Your Car at Home Makes Sense
Before we dive into the how-to, let us talk about why doing it yourself is worth your time. There are plenty of reasons people choose home car wash over a drive-through car wash or a professional detailer.
Save Money Over Time
A single professional detail can cost anywhere from 100 to 300 dollars depending on your vehicle and the level of service. Even a basic exterior wash at a detail shop runs 20 to 50 dollars. When you do it at home, your supplies last for multiple washes. A bottle of quality car soap costs around 15 dollars and can handle 10 to 20 washes. Over a year, the savings add up fast. You are investing once in good car wash supplies and then enjoying clean results for months.
Better Control Over Products and Techniques
When you wash your own car, you decide exactly what touches your paint. You know what soap goes on the surface. You choose the type of microfiber cloth. You control the water pressure and temperature. This matters a lot because some automatic car washes use harsh brushes and chemicals that strip wax and leave micro-scratches. With a DIY car wash, you protect your finish the way you want.
Spot Clean Whenever You Need To
One of the biggest perks of cleaning at home is flexibility. Bird droppings show up on a Tuesday morning? You do not need to drive to a car wash. A coffee spill in the back seat? You can grab a cloth and some cleaner right away. Regular exterior car cleaning and quick touch-ups keep small problems from becoming big, expensive repairs later.
Gathering the Right Car Cleaning Supplies
Before you start washing, you need the proper tools. Using the wrong products can damage your paint, dry out your interior, or leave streaks. Here is a straightforward list of what you should have on hand for a proper home car wash.
Essential Wash Items
- Car-specific soap: Never use dish soap. It strips wax and can dull your paint. Look for a pH-balanced car wash soap designed for automotive use.
- Two buckets: This is the foundation of the two-bucket method. One bucket holds soapy water. The other holds clean rinse water with a grit guard at the bottom.
- Microfiber wash mitt: Soft, gentle, and highly absorbent. Microfiber traps dirt without scratching the surface.
- Microfiber drying towels: At least two or three large ones. These absorb water quickly and leave no lint behind.
- Soft-bristle brush: Great for scrubbing tires, wheels, and hard-to-reach areas.
- Hose with adjustable nozzle: A gentle flow setting helps rinse without blasting water into seams and gaps.
Interior Cleaning Essentials
- Vacuum with multiple attachments: A crevice tool, brush attachment, and upholstery nozzle cover most interior cleaning needs.
- All-purpose interior cleaner: A spray cleaner safe for plastic, vinyl, and leather surfaces.
- Glass cleaner: Use a dedicated automotive glass cleaner for streak-free windows and mirrors.
- Leather conditioner (if applicable): Keeps leather seats soft and prevents cracking over time.
- Plastic trim restorer: Brings faded black plastic pieces back to a rich, dark finish.
Extras That Make a Big Difference
- Detailing brushes: Small brushes in various sizes help you clean vents, seams, and textured surfaces.
- Clay bar or clay mitt: Removes embedded contaminants from the paint that washing alone cannot reach.
- Car wax or sealant: Provides a protective layer that shields paint from UV rays, rain, and dirt.
- Tire dressing: Gives tires a clean, dark look and helps protect rubber from cracking.
- Air freshener: A quality car air freshener finishes the job and keeps your cabin smelling great.
Quick Tip: Do not dump all your supplies on the ground. Use a caddy or a tote bag to carry everything from your garage to the car. It keeps things organized and saves you from walking back and forth every time you need a different product.
Step-by-Step Guide to Washing the Exterior
Now comes the fun part. Washing the exterior is where most people start, and it is the section that makes the biggest visual impact. Follow these steps for a clean car exterior that turns heads.
Step 1: Rinse Thoroughly First
Before you apply any soap, rinse the entire car with water. This removes loose dirt, dust, and debris that could scratch the paint during washing. Start from the top and work your way down. Pay extra attention to the lower panels, wheel wells, and areas where mud and grime build up. A good pre-rinse should take about two to three minutes.
Step 2: Use the Two-Bucket Method
This is the single most important technique for scratch-free car washing. Fill one bucket with soapy water and the other with clean rinse water. Place a grit guard at the bottom of each bucket. After washing a section of the car, dip your mitt into the rinse bucket to flush off dirt. Then reload soap from the wash bucket. This simple habit keeps abrasive particles away from your paint and dramatically reduces the risk of swirl marks.
Step 3: Wash in Sections
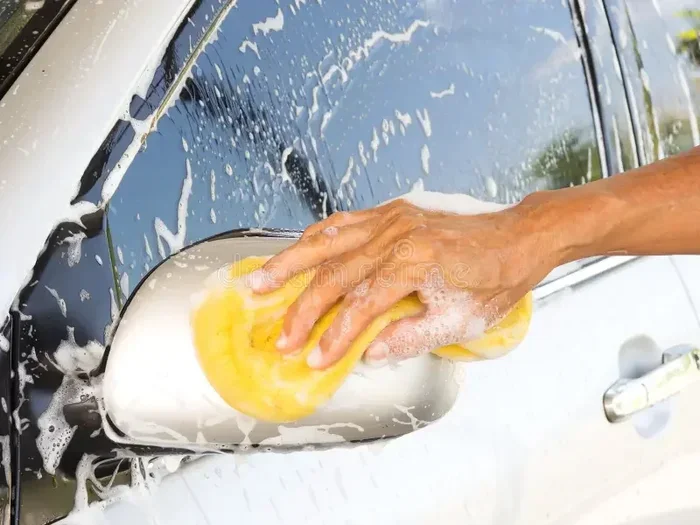
Do not try to wash the entire car at once. Work one panel at a time. Start with the roof, then move to the hood, trunk, and finally the lower body panels. Wash each section using straight-line motions rather than circular ones. Circular motions can create micro-swirl marks that are visible under direct sunlight. After washing a section, rinse it off immediately before moving to the next.
Step 4: Clean the Wheels and Tires
Wheels are often the dirtiest part of the car. Brake dust, road grime, and tar accumulate quickly. Use a dedicated wheel cleaner and a soft brush to scrub each wheel. For tires, apply a tire cleaner or use your all-purpose soap and the brush to get into the sidewalls. Rinse thoroughly. Once clean and dry, apply a tire dressing for that rich, finished look.
Step 5: Dry Properly
Drying is a step many people skip, and it is a mistake. Letting your car air dry leaves water spots that can etch into the paint over time. Use clean, dry microfiber towels to pat the surface dry. Do not rub aggressively. Gently blot and drag the towel across the surface, flipping to a dry section frequently. Work from the top down again, and make sure you dry all the crevices around mirrors, door handles, and trim pieces.
Expert Insight: The best time to wash your car is in the shade or during cooler parts of the day. Washing in direct sunlight causes soap and water to dry too quickly, leaving streaks and water spots. Early morning or late afternoon is ideal for exterior car cleaning.
Deep Cleaning the Car Interior
The exterior gets most of the attention, but the interior deserves just as much care. A clean cabin makes every drive more enjoyable and keeps materials in better condition over time. Here is how to tackle a thorough car interior detailing session.
Remove Clutter and Loose Items
Start by taking everything out of the car. Remove floor mats, seat covers, trash, and any personal items. Shake out the floor mats outside and set them aside for cleaning. This gives you a blank canvas to work with and helps you see exactly what needs attention.
Vacuum Everything
Use your vacuum with the appropriate attachments. Start with the seats, working across the surface and between cushions. Move to the carpeted floor areas, using the brush attachment to agitate embedded dirt. Then vacuum the trunk. Finish with the crevice tool to clean seams, gaps between seats, and areas around the center console. A thorough vacuuming session should take about 10 to 15 minutes.
Wipe Down All Surfaces
Spray your all-purpose interior cleaner onto a microfiber cloth (not directly onto surfaces) and wipe down the dashboard, center console, door panels, and steering wheel. Use a detailing brush for vents, button clusters, and textured surfaces. For leather seats, use a leather cleaner followed by a conditioner to keep the material supple and protected. Avoid products that leave a greasy residue, as they can make surfaces slippery and attract more dust.
Clean the Windows and Mirrors
Spray your automotive glass cleaner onto a clean microfiber towel and wipe each window in a vertical motion on the outside and a horizontal motion on the inside. This makes it easy to identify which side any streaks are on. Do not forget the rearview mirror, side mirrors, and the inside of the windshield. Streak-free glass improves visibility and gives the whole interior a polished look.
Treat Stains and Odors
For carpet stains, blot the area with a stain remover designed for automotive upholstery. Avoid rubbing, which pushes the stain deeper. For lingering odors, sprinkle baking soda on the carpet and seats, let it sit for 15 to 20 minutes, then vacuum it up. You can also place an air freshener for car in a discreet spot to keep the cabin smelling pleasant between cleanings.
Quick Tip: Make interior car cleaning part of your monthly routine. A 20-minute session every four weeks prevents buildup and keeps your car feeling fresh without requiring deep cleaning sessions.
Protecting and Finishing Your Car
Once the wash and interior detail are complete, you want to protect all that hard work. This is where car waxing and paint protection come into play.
Apply a Clay Bar Treatment
Over time, tiny contaminants embed themselves in your clear coat. A clay bar removes these particles and leaves the paint feeling incredibly smooth. Spray a clay lubricant onto a small section, glide the clay bar gently across the surface, and wipe away residue with a clean microfiber towel. You will be amazed at how smooth the paint feels afterward.
Wax or Seal for Protection
Waxing adds a layer of protection that shields your paint from UV rays, acid rain, bird droppings, and environmental contaminants. Apply a thin, even layer using a foam applicator pad. Let it haze according to the product instructions, then buff off with a clean microfiber towel. If you prefer longer-lasting protection, a ceramic paint sealant is a great alternative that lasts several months longer than traditional wax.
Dress the Exterior Trim and Tires
Apply a water-based trim dressing to faded plastic and rubber pieces around the car. Use a small applicator pad or a foam brush for precise application. For tires, apply a tire shine product that matches your desired finish, whether that is a subtle matte look or a glossy wet appearance. Wipe any excess dressing off the wheel wells and lower panels to avoid slinging onto freshly painted surfaces.
Key Takeaway: Protecting your car after cleaning is just as important as the cleaning itself. A good wax or sealant acts as a shield, making future washes easier and keeping your car paint protection intact for months.
Common Mistakes People Make When Washing at Home
Even well-meaning car owners make mistakes that can cause damage. Here are the most common errors to avoid during your next home car wash session.
- Using dish soap or household cleaners: These products strip away wax and sealant. They are too harsh for automotive paint and can cause fading over time.
- Washing in direct sunlight: Heat causes soap and water to dry too fast, leaving stubborn water spots and soap residue.
- Using a single bucket: This reapplies dirty water to your wash mitt, increasing the chance of scratching the paint.
- Skipping the rinse before washing: Loose dirt and debris get pushed across the surface during washing, creating fine scratches.
- Drying with a regular towel or chamois: Household towels can contain rough fibers that scratch the paint. Always use dedicated microfiber drying towels.
- Neglecting the interior: A clean exterior with a dirty interior does not equal a clean car. Both deserve equal attention.
- Using too much product: More product does not mean better results. Follow the recommended dilution ratios and application amounts on the product label.
Quick Tip: If you are unsure whether a product is safe for your car, test it on a small hidden area first. This simple habit prevents accidental damage and gives you peace of mind.
How Often Should You Clean Your Car at Home?
The frequency of your washes depends on several factors. Where you live, how often you drive, and what conditions your car faces all play a role. As a general rule, washing your car every two weeks is a solid baseline. If you live near the coast where salt air is common, or if you frequently drive on dirt roads, you may need to wash more often. During winter months when road salt is used, weekly washes for the undercarriage and lower panels help prevent rust and corrosion.
Interior cleaning can follow a slightly different schedule. A quick vacuum and wipe-down every two weeks keeps things tidy. A full interior car detailing session with steam cleaning and conditioning should happen once a month or every six weeks, depending on usage.
The key is consistency. Regular car cleaning at home is far easier and faster than letting dirt and grime build up for months and then facing a massive cleaning session. A little effort on a regular basis pays off tremendously in the long run.
Final Thoughts
Car cleaning at home is one of the most rewarding things you can do for your vehicle. It saves money, gives you complete control over the process, and keeps your car looking and feeling its best. With the right supplies, a little patience, and the techniques covered in this guide, you can achieve results that rival any professional detailer.
Start simple. Grab your buckets, your microfiber cloths, and a quality car soap. Follow the steps from top to bottom, inside and out. Protect your work with wax or sealant, and build a routine that fits your schedule. Over time, washing your car at home becomes second nature. You will notice the difference in your paint’s condition, your interior’s freshness, and your overall pride in the vehicle.
Your car is one of the biggest investments you make. Taking care of it at home is a small price to pay for years of looking and feeling great every time you get behind the wheel. So grab your supplies, roll up your sleeves, and give your car the care it deserves.
Frequently Asked Questions
What is the best soap for washing a car at home?
Look for a pH-balanced car wash soap specifically formulated for automotive use. Avoid dish soap or household cleaners, as they strip away wax and can damage your paint over time. Brands like Meguiar’s, Chemical Guys, and Mothers offer excellent options at various price points.
How often should I wash my car at home?
Every two weeks is a good general rule for most drivers. However, if you live in a coastal area, drive on dirt roads frequently, or deal with winter road salt, you may need to wash more often. Regular washing prevents buildup and protects your paint and undercarriage from corrosion.
Can I use a pressure washer to clean my car at home?
Yes, but use it carefully. Set the pressure washer to a low or medium setting and keep the nozzle at least 12 inches from the surface. High pressure too close to the paint can cause damage or force water into seams and electrical components. Always rinse from a distance and avoid spraying directly at windows, mirrors, and seals.
What is the two-bucket method and why does it matter?
The two-bucket method involves using one bucket for soapy wash water and another for clean rinse water. Each bucket has a grit guard at the bottom. After wiping a section of the car, you rinse your mitt in the clean water bucket before reloading soap. This prevents you from dragging dirt and grit back across your paint, which is the number one cause of wash-induced scratches.
How do I keep my car interior smelling fresh?
Regular vacuuming and wiping down surfaces are the foundation. Sprinkle baking soda on carpets and seats to absorb odors, then vacuum after 15 to 20 minutes. Use a quality air freshener, and consider placing an open box of baking soda under a seat between cleanings. Avoid masking odors with strong scents; address the source of the smell instead.
Is waxing really necessary after washing?
While not mandatory after every wash, waxing regularly provides a protective layer that shields your paint from UV rays, bird droppings, tree sap, and environmental contaminants. Most experts recommend waxing every two to three months. A good wax or ceramic sealant makes future washes easier and helps your car stay cleaner longer between sessions.