Difference Between Tail Light and Tail Light Assembly
The difference between a tail light and a tail light assembly is simple but important. A tail light is just one small bulb or lens, while the assembly is the complete housing unit that holds everything together. Understanding this distinction helps you make smarter buying decisions, save money, and keep your vehicle safe and road-legal.
Have you ever stared at a parts catalog and wondered, what exactly is the difference between a tail light and a tail light assembly? It is a question that comes up more often than you might think. Many car owners use these terms interchangeably, but they actually refer to two very different things.
Knowing the distinction can save you time, money, and a lot of frustration at the auto parts store. Whether you are fixing a burned-out bulb or replacing a cracked housing, understanding what you need is the first step. In this guide, we will break it all down in plain, simple language.
We will cover what each part does, how they differ, when to replace which one, and how to choose the right option for your vehicle. By the end, you will feel confident walking into any parts shop or ordering online. Let us get into it.
Key Takeaways
- A tail light is a single component: It is the bulb or lens that glows red when you turn on your ignition.
- A tail light assembly is the full unit: It includes the housing, lens, reflector, bulb socket, and wiring connectors.
- Replacing just the bulb is cheaper: But replacing the whole assembly may be necessary after damage or cracks.
- OEM and aftermarket options exist: Both have pros and cons for quality, fit, and price.
- DOT compliance matters: Always choose parts that meet safety standards for your vehicle.
- DIY installation is possible: With basic tools and a little patience, you can swap out parts at home.
- LED upgrades are popular: They offer brighter light, longer life, and better energy efficiency.
📑 Table of Contents
What Is a Tail Light?
A tail light is a single lighting component on your vehicle. It is the red light that illuminates on the back of your car when you turn on the ignition or hit the brakes. Think of it as one small piece of a much larger puzzle.
Most tail lights use an incandescent bulb or an LED bulb inside a small lens. The lens is usually red and helps spread the light outward so other drivers can see you. Tail lights serve a very important purpose: they signal your presence on the road, especially at night or in poor weather.
How a Tail Light Works
When you turn the key in your ignition, power flows through the tail light wiring to the bulb. The filament inside the bulb heats up and glows red. The lens covers the bulb and directs the light backward and to the sides.
Some modern vehicles use LED tail lights instead of traditional bulbs. LEDs light up instantly and use less energy. They also last much longer than incandescent bulbs, which means fewer replacements over time.
Common Tail Light Problems
- Burned-out bulb: This is the most common issue. One bulb goes out, and you notice it when someone flashes their lights at you.
- Cloudy lens: Over time, the plastic lens can become foggy or yellowed. This reduces visibility.
- Corroded socket: Moisture can get into the socket and cause poor electrical contact.
- Blown fuse: A blown fuse in the wiring harness can kill power to one or both tail lights.
What Is a Tail Light Assembly?
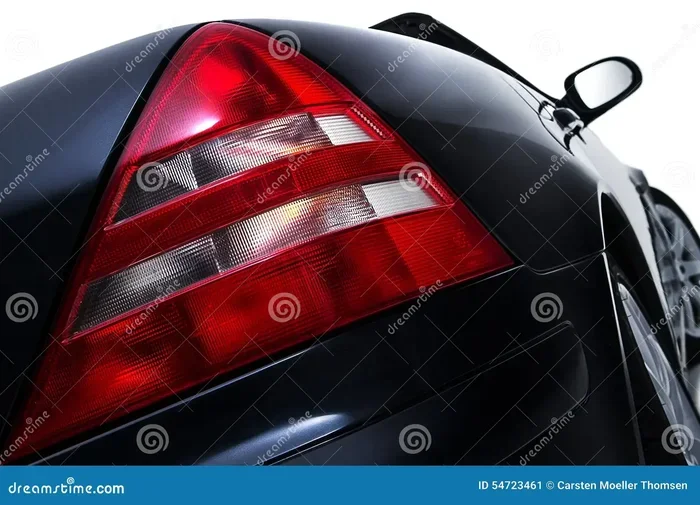
A tail light assembly is the complete housing unit that contains multiple components. It is the entire piece that mounts to the back of your vehicle. When you buy a tail light assembly, you are getting everything in one package.
The assembly includes the housing, the lens, the reflector, the bulb sockets, and the wiring connectors. It is essentially the whole unit that you bolt or clip onto your car. Think of it like a lamp: the bulb alone is the tail light, but the lamp fixture with its shade, wiring, and base is the assembly.
Parts of a Tail Light Assembly
A typical tail light assembly consists of several key parts working together. Each part plays a role in making the light function properly and safely.
- Housing: The outer shell that holds everything in place. It is usually made of durable plastic or metal.
- Lens: The red, clear, or tinted cover that protects the bulb and directs the light beam.
- Reflector: A shiny surface behind the bulb that bounces light outward, making it brighter and more visible.
- Bulb Socket: The connector that holds the bulb and links it to the electrical system.
- Wiring Harness Connector: The plug that connects the assembly to your vehicle’s electrical system.
Why the Assembly Matters
The assembly does more than just hold the bulb. It shapes the light pattern so it meets safety standards. A damaged or poorly designed assembly can throw light in the wrong direction. This can reduce visibility and even create a safety hazard.
Also, the assembly protects the internal components from moisture, dirt, and road debris. A good-quality housing keeps water out and prevents corrosion. This is why the vehicle lighting system relies on the assembly as a whole, not just the bulb.
Key Differences Between Tail Light and Tail Light Assembly
The difference between a tail light and a tail light assembly comes down to scope. One is a single part. The other is the complete unit. Let us look at the main differences side by side.
Scope and Components
A tail light refers to the bulb, lens, or small light element. A tail light assembly includes the bulb, lens, housing, reflector, socket, and connector. The assembly is a complete, self-contained unit.
Replacement Scenario
You replace a tail light when the bulb burns out or the lens cracks slightly. You replace the entire assembly when the housing is damaged, the wiring is built into the unit, or multiple components have failed.
Cost Comparison
Replacing a single tail light bulb costs much less than replacing the full assembly. A bulb might cost five to fifteen dollars. A full assembly can range from twenty to two hundred dollars depending on the vehicle and brand.
Installation Complexity
Swapping a tail light bulb is usually a quick job. You pop open the trunk, twist the old bulb out, and twist the new one in. Replacing the full assembly involves removing screws or bolts, disconnecting the wiring harness, and mounting the new unit.
Comparison Table
| Feature | Tail Light | Tail Light Assembly |
|---|---|---|
| What it includes | Bulb or lens only | Full housing unit with all parts |
| Cost | Low ($5-$15) | Moderate to high ($20-$200) |
| Installation time | 5-15 minutes | 20-45 minutes |
| When to replace | Burned bulb, cracked lens | Damaged housing, wiring issues, multiple failures |
| Skill level needed | Beginner | Intermediate |
| Durability | Bulb lasts 1-5 years | Assembly lasts 5-15 years |
| DOT compliance | Bulb must meet standards | Full assembly must meet standards |
When to Replace a Tail Light vs. the Full Assembly
Knowing when to replace just the bulb versus the whole assembly can save you a lot of money. Here are some clear guidelines to follow.
Replace the Tail Light Bulb When
- One side is darker than the other: This usually means the bulb is burned out on one side.
- Your tail light flickers: A loose filament or corroded socket often causes flickering.
- The lens is intact: If the housing and lens are in good shape, just swap the bulb.
- Only one light is out: A single bulb failure does not require replacing the entire unit.
Replace the Full Tail Light Assembly When
- The housing is cracked or broken: A cracked housing lets moisture in and can damage the bulb and wiring.
- Multiple components have failed: If the bulb, socket, and lens are all damaged, replacing the whole unit makes more sense.
- The wiring is integrated into the housing: Some modern vehicles have wiring built directly into the assembly. In these cases, you must replace the full unit.
- The lens is severely clouded or discolored: A heavily yellowed lens reduces light output and may not pass inspection.
- You are upgrading to LED or modern styling: Many owners replace the full assembly to upgrade to LED tail lights or a newer design.
Quick Tip
Before you buy any replacement part, check your vehicle owner’s manual. It will tell you whether your car uses a replaceable bulb or a full assembly setup. This one step can save you from buying the wrong part.
How to Choose the Right Replacement Part
Choosing between OEM and aftermarket parts is one of the most important decisions you will make. Both options have advantages and trade-offs.
OEM Parts
OEM stands for Original Equipment Manufacturer. These parts are made by the same company that built your vehicle. They fit perfectly and match the factory specifications. OEM tail light assemblies tend to be more expensive, but they offer the best fit and finish.
If you want your car to look exactly as it did when you drove it off the lot, OEM parts are the way to go. They also tend to hold their value better if you plan to sell the vehicle later.
Aftermarket Parts
Aftermarket parts are made by third-party manufacturers. They come in a wide range of prices and quality levels. Some aftermarket tail light assembly kits are nearly identical to OEM parts. Others are budget options that may not last as long.
The biggest advantage of aftermarket parts is the price. You can often find high-quality replacements for a fraction of the OEM cost. Just make sure the part is DOT compliant and fits your specific vehicle model and year.
LED Upgrades
Many car owners are switching to LED tail light bulbs and assemblies. LEDs offer several benefits:
- Brighter light output: LEDs illuminate faster and more brightly than incandescent bulbs.
- Longer lifespan: An LED bulb can last 10,000 to 50,000 hours.
- Lower energy use: LEDs draw less power from your vehicle’s electrical system.
- Modern look: LED strips and clusters give your car a sleek, contemporary appearance.
However, not all LED upgrades are plug-and-play. Some require additional wiring or resistors to prevent flickering. Always check compatibility before purchasing.
Installation Tips and Common Mistakes
Whether you are replacing a single tail light bulb or the full assembly, a few tips can make the job easier and safer.
Installing a Tail Light Bulb
- Turn off the vehicle and let the lights cool.
- Open the trunk and locate the back of the tail light housing.
- Remove the protective cover or panel to access the bulb socket.
- Twist the old bulb counterclockwise and pull it straight out.
- Insert the new bulb and twist it clockwise until it locks in place.
- Test the light before reassembling the panels.
Installing a Full Tail Light Assembly
- Disconnect the negative battery terminal for safety.
- Open the trunk and remove the interior trim panel behind the assembly.
- Unplug the wiring harness connector from the old assembly.
- Remove the mounting screws or bolts holding the unit in place.
- Carefully pull the old assembly out from the outside of the vehicle.
- Reverse the steps to install the new assembly.
- Reconnect the battery and test all functions before finishing.
Common Mistakes to Avoid
- Mixing bulb types: Using the wrong wattage or bulb type can damage the wiring or cause a short circuit.
- Forgetting to test before reassembly: Always test the new part before putting everything back together.
- Over-tightening screws: This can crack the housing or strip the mounting points.
- Ignoring moisture issues: If water got into the old assembly, check for and fix any seal or drain tube problems before installing the new unit.
- Skipping DOT compliance: Non-compliant parts can fail safety inspections and may be illegal to use on public roads.
Expert Insight
Many experienced mechanics recommend replacing the full assembly rather than just the bulb when the vehicle has over 100,000 miles. Over time, the socket connections can corrode and the lens can degrade. A fresh assembly gives you a reliable, fully functioning unit that will last for years.
Key Takeaways
- A tail light is a single component: It is the bulb or lens that glows red when you turn on your ignition.
- A tail light assembly is the full unit: It includes the housing, lens, reflector, bulb socket, and wiring connectors.
- Replacing just the bulb is cheaper: But replacing the whole assembly may be necessary after damage or cracks.
- OEM and aftermarket options exist: Both have pros and cons for quality, fit, and price.
- DOT compliance matters: Always choose parts that meet safety standards for your vehicle.
- DIY installation is possible: With basic tools and a little patience, you can swap out parts at home.
- LED upgrades are popular: They offer brighter light, longer life, and better energy efficiency.
Frequently Asked Questions
Can I replace just the bulb instead of the whole tail light assembly?
Yes, in most cases you can replace just the bulb if the housing and lens are still in good condition. Check your vehicle manual to confirm whether your tail light uses a replaceable bulb or a sealed assembly. Swapping a bulb is quick and much cheaper than replacing the full unit.
How much does it cost to replace a tail light assembly?
The cost varies depending on your vehicle make and model. A basic aftermarket assembly typically costs between $20 and $80. OEM assemblies can range from $50 to $200 or more. Labor costs at a shop usually add $50 to $100 if you do not do the work yourself.
Are LED tail light assemblies worth the upgrade?
Yes, LED assemblies offer several benefits. They light up faster, last longer, and use less energy than traditional bulbs. They also give your vehicle a modern look. The upfront cost is higher, but the long-term savings on replacements and energy make them a smart choice.
What does DOT compliant mean for tail lights?
DOT compliant means the part meets the safety standards set by the Department of Transportation. These standards ensure the tail light provides adequate brightness, proper light color, and correct beam pattern. Always look for DOT compliance when buying replacement parts to keep your vehicle street legal.
How long does a tail light assembly last?
A quality tail light assembly can last anywhere from 5 to 15 years. The lifespan depends on driving conditions, exposure to weather, and the quality of the materials. The bulbs inside may need replacement sooner, but the housing and lens often last the lifetime of the vehicle with proper care.
Can I drive with a broken tail light assembly?
No, you should not drive with a broken or non-functioning tail light. Tail lights are a critical safety feature that lets other drivers know your vehicle is on the road. A broken assembly can result in a traffic ticket, failed inspection, and increased risk of a rear-end collision. Replace it as soon as possible.
Conclusion
The difference between tail light and tail light assembly is straightforward once you understand the basics. A tail light is a single component, usually a bulb or lens. A tail light assembly is the complete unit that includes the housing, lens, reflector, socket, and wiring connector.
Knowing this difference helps you make smarter repair decisions. You can save money by replacing just the bulb when possible. You can also make informed choices when a full assembly replacement is needed. Whether you go with OEM or aftermarket parts, always prioritize quality and DOT compliance.
Your vehicle’s automotive lighting system plays a vital role in keeping you safe on the road. Take the time to understand your parts, choose the right replacements, and enjoy the confidence that comes with a well-maintained car. Now you have the knowledge to handle any tail light issue that comes your way.