Why Wont My Sun Visor Stay Up Try These Simple Fixes
A sun visor that won’t stay up is one of the most annoying car problems you can face every single day. The good news is that the fix is usually simple, cheap, and something you can handle at home. This guide walks you through every common reason your visor droops and shows you exactly how to fix it step by step.
You are driving down the road. The sun is blazing through your windshield. You reach up to flip your sun visor down, but it just flops right back up. Or maybe it stays down but won’t hold at the right angle. Either way, it is incredibly frustrating.
This is one of those small car problems that ruins your entire drive. You cannot see the road properly, and you keep thinking about it every few minutes. The good news is that you do not need to live with it. In most cases, the fix is quick, affordable, and something you can do yourself in your garage or driveway.
This article covers every reason your visor might be misbehaving. We also walk you through the exact steps to fix each problem. By the end, you will know exactly what is wrong and how to make it right. Let us get into it.
Key Takeaways
- Worn-out clip or hinge: The most common reason a sun visor won’t stay up is a broken or stretched clip mechanism.
- Easy DIY fixes: Most sun visor problems can be solved with basic tools and a few dollars in parts.
- Replacement is affordable: A new visor clip or full visor replacement costs very little compared to a dealership visit.
- Preventive care helps: Regular cleaning and gentle handling can extend the life of your sun visor significantly.
- Know when to call a pro: Some complex hinge issues are best handled by a mechanic to avoid further damage.
- Lubrication works wonders: A simple application of silicone spray can fix a sticky or stiff visor hinge in minutes.
📑 Table of Contents
- Why Does My Sun Visor Keep Drooping?
- How to Fix a Sun Visor That Won’t Stay Up
- Comparison Table: DIY Fix vs Professional Repair
- Common Mistakes People Make When Fixing a Sun Visor
- How to Prevent Sun Visor Problems in the Future
- When Should You See a Professional?
- How Much Does It Cost to Fix a Sun Visor?
- Final Thoughts
Why Does My Sun Visor Keep Drooping?
Before you can fix the problem, you need to understand what is causing it. A sun visor has a few simple parts that work together. There is the visor itself, the hinge, the clip, and the support arm. When any one of these parts wears out or breaks, the visor will not stay where you put it.
Here are the most common reasons your sun visor stays down and then falls back up again:
Worn Out Visor Clip
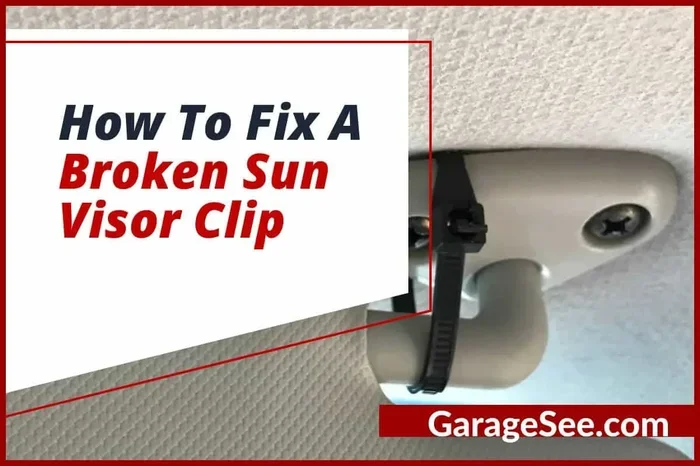
The clip is the little plastic piece that grabs onto the roof rail. Over time, the plastic gets loose or cracks. When this happens, the clip can no longer hold the visor in place. This is by far the most common reason visors droop. You will notice the visor slides down slowly or falls completely when you let go.
Broken or Loose Hinge
The hinge connects the visor to the mounting bracket. If the hinge screws come loose, the visor will wobble and sag. In some cases, the hinge itself breaks, especially in older vehicles. A broken hinge means the visor has no structural support at all.
Stretched or Broken Spring
Some visors use a small spring to help hold them in position. If the spring loses its tension or snaps, the visor will not stay put. This is more common in newer vehicles with adjustable visors that swivel or rotate.
Damaged Roof Rail
The roof rail is the track where the visor clips attach. If the rail gets bent, cracked, or damaged, the clip has nothing to grip onto. In this case, replacing the clip alone will not solve the problem. You will need to fix or replace the rail as well.
Debris and Dirt Buildup
Dust, crumbs, and grime can build up inside the hinge and clip mechanism. This buildup creates friction and prevents the visor from locking into place. Regular cleaning can prevent this issue from developing in the first place.
How to Fix a Sun Visor That Won’t Stay Up
Now that you know what might be wrong, let us look at how to fix each problem. Most of these repairs take less than 15 minutes and require only basic tools like a screwdriver, pliers, or a wrench.
Fix 1: Replace the Visor Clip
This is the easiest and most common fix. Here is what you need to do:
- Flip the visor down and look for the clip screws or clips holding it to the roof rail.
- Remove the old clip carefully. Use a flathead screwdriver to pry it loose if needed.
- Take the old clip to an auto parts store and find a matching replacement.
- Install the new clip by reversing the removal steps.
- Test the visor by flipping it up and down several times.
Pro Tip: Replacement clips usually cost between $2 and $8. They are available at any auto parts store or online. Keep a few spare clips in your glove box for emergencies.
Fix 2: Tighten the Hinge Screws
If the visor wiggles but does not completely fall, the hinge screws may just need tightening. Use a Phillips or flathead screwdriver to snug them up. Do not overtighten, or you risk stripping the screw hole in the plastic.
If the screw holes are stripped, you can use a toothpick or wooden matchstick dipped in glue to fill the hole. Let it dry completely, then reinsert the screw. This simple trick works surprisingly well.
Fix 3: Lubricate the Hinge Mechanism
Sometimes the visor just needs a little lubrication. Spray a small amount of silicone-based lubricant into the hinge and clip area. Work the visor back and forth several times to spread the lubricant evenly. This reduces friction and helps the visor lock into place more securely.
Quick Tip: Never use WD-40 or oil-based lubricants on plastic parts. They can degrade the plastic over time. Stick with silicone spray or white lithium grease for best results.
Fix 4: Replace the Entire Visor
If the visor is cracked, shattered, or the internal mechanism is completely destroyed, it might be time for a full replacement. A new visor typically costs between $15 and $40 depending on your vehicle make and model. The replacement process involves removing a few screws and unclipping the old visor from the roof rail.
Make sure to match the replacement visor to your specific vehicle. Visors differ in size, shape, and attachment style between car models. Check your owner’s manual or look up the part number online before purchasing.
Fix 5: Repair or Replace the Roof Rail
If the roof rail itself is damaged, you have a few options. Minor cracks can sometimes be repaired with automotive plastic adhesive. For more severe damage, the entire rail may need to be replaced. This is a more involved repair and may require removing the headliner panel. If you are not comfortable doing this yourself, a mechanic can handle it for a reasonable cost.
Comparison Table: DIY Fix vs Professional Repair
| Repair Type | Cost (DIY) | Cost (Professional) | Difficulty Level | Time Required |
|---|---|---|---|---|
| Clip Replacement | $2 – $8 | $50 – $100 | Very Easy | 5 – 10 minutes |
| Screw Tightening | Free | $50 – $75 | Easy | 5 minutes |
| Hinge Lubrication | $5 – $10 | $50 – $80 | Very Easy | 10 minutes |
| Full Visor Replacement | $15 – $40 | $80 – $150 | Moderate | 15 – 30 minutes |
| Roof Rail Repair | $5 – $20 | $100 – $250 | Hard | 1 – 3 hours |
As you can see from the table, most visor repairs are very affordable when done yourself. The only exception is roof rail damage, which can get more complicated. But even then, doing it yourself can save you a significant amount of money.
Common Mistakes People Make When Fixing a Sun Visor
There are a few mistakes that people make over and over again when trying to fix their visors. Avoiding these can save you a lot of time and frustration.
- Using the wrong replacement clip: Not all visor clips are the same. Check your vehicle model before buying a replacement. A clip that looks similar may not fit properly.
- Overtightening screws: Cranking down too hard can strip the screw holes or crack the plastic. Tighten just until the visor feels snug and secure.
- Ignoring the root cause: Sometimes the visor droops because of a bigger problem like a damaged roof rail. Fixing the clip alone will not solve the issue if the rail is broken.
- Using super glue instead of proper adhesive: Super glue can damage plastic surfaces and make future repairs much harder. Use automotive-specific adhesives instead.
- Forcing the visor into position: If the visor does not move smoothly, do not force it. Something is likely jammed or broken. Investigate first before applying pressure.
How to Prevent Sun Visor Problems in the Future
The best way to deal with a droopy visor is to prevent the problem from happening in the first place. Here are some simple habits that will keep your visors working smoothly for years.
- Handle your visors gently: Do not slam them up or down. Flip them slowly and smoothly to reduce stress on the clip and hinge.
- Clean the mechanism regularly: Once every few months, flip the visor down and wipe away any dust or debris from the hinge area. A cotton swab works great for this.
- Check the clips periodically: Give the visor a gentle tug every few months. If it feels loose, inspect the clip and replace it before it completely fails.
- Keep spare parts on hand: A pack of replacement clips costs just a few dollars and can save you a trip to the store when a clip breaks unexpectedly.
- Avoid hanging heavy items on the visor: Some people hang sunglasses or toll passes from the visor. The extra weight puts unnecessary strain on the clip and hinge over time.
When Should You See a Professional?
Most sun visor repairs are simple enough for a DIY approach. But there are situations where you should call in a professional mechanic or auto trim specialist.
If the roof rail is severely damaged or if the visor mount is integrated into the headliner panel, the repair can get complicated. Removing and reinstalling the headliner requires care and experience. If you are not comfortable with that kind of work, it is worth paying a professional to do it right.
Also, if you have tried the fixes above and the visor still will not stay up, there may be a deeper issue you cannot see. A mechanic can inspect the entire mounting system and identify problems that are not obvious from the outside.
Expert Insight: According to experienced auto technicians, the visor clip is the first thing to check in 9 out of 10 cases. It is the weakest link in the visor system and the most common point of failure. Always start with the simplest explanation before moving on to more complex repairs.
How Much Does It Cost to Fix a Sun Visor?
The cost depends entirely on what is wrong and how you approach the fix. Here is a quick breakdown of the typical costs you can expect.
For a simple clip replacement, you are looking at under $10 for the part if you buy it yourself. If a mechanic does it for you, expect to pay between $50 and $100 for labor. The part itself costs very little, so the markup is mostly for the labor time.
A full visor replacement part costs between $15 and $40 online or at an auto parts store. Professional installation for a full visor swap typically runs $80 to $150. Again, the DIY route saves you a significant amount.
Roof rail repairs are the most expensive scenario. The rail itself can cost $30 to $80, and labor for a professional can add $100 to $200 depending on how much disassembly is required. This is the one repair where the cost can add up quickly.
Overall, the vast majority of sun visor repairs are inexpensive and straightforward. You should not have to spend more than a few dollars and a little bit of your time to get your visor working properly again.
Final Thoughts
A sun visor that won’t stay up is one of those annoying car problems that seems small but affects your comfort every single time you drive. The good news is that it is almost always an easy fix. Whether it is a worn clip, a loose hinge, or a simple need for lubrication, the solution is usually quick and affordable.
Start with the simplest fix and work your way up. In most cases, replacing the clip or tightening a screw will solve the problem entirely. If the visor is beyond repair, a full replacement is still a very inexpensive job, especially if you do it yourself.
Take care of your car’s interior components, and they will last much longer. Regular cleaning and gentle handling go a long way. And always keep a few spare clips on hand so you are prepared when the next one breaks.
Now that you know exactly how to diagnose and fix a droopy sun visor, you can get back to driving comfortably. Do not let a small plastic piece ruin your ride. Grab your screwdriver, find the right replacement part, and get it fixed today. Your eyes and your sanity will thank you every time you get behind the wheel.
Frequently Asked Questions
Why does my sun visor keep falling down even after I replace the clip?
The issue might be with the roof rail itself, not just the clip. If the rail is bent or damaged, the new clip will not grip properly. Inspect the rail closely and consider replacing it if it shows signs of wear or cracking.
Can I use super glue to fix a broken sun visor clip?
It is not recommended. Super glue can damage plastic surfaces and makes future repairs much harder. Use automotive-specific adhesive or simply replace the clip with a new one. Replacement clips are very affordable and widely available.
How much does it cost to replace a sun visor at a dealership?
Dealerships typically charge between $100 and $200 for a sun visor replacement, including parts and labor. The same repair done at home or by an independent mechanic can cost as little as $15 to $40 for the part alone.
Is it safe to drive with a broken sun visor?
Yes, it is generally safe. A broken visor will not affect your vehicle’s mechanical systems or safety features. However, a drooping visor can block your view of the road or mirrors, which can be a visual distraction. It is best to fix it promptly for optimal driving comfort and visibility.
How long do sun visor clips typically last?
With normal use, sun visor clips last between 5 and 10 years. However, frequent rough handling, exposure to extreme heat, and hanging heavy items on the visor can shorten their lifespan significantly. Regular gentle use and periodic inspection will help them last longer.
What type of lubricant is best for a sticky sun visor hinge?
Silicone spray is the best option for visor hinges. It is safe for plastic and rubber components and provides smooth, long-lasting lubrication. Avoid oil-based products like WD-40, as they can deteriorate plastic parts over time and create a greasy residue.