Can I Replace a Headlight by Myself Without a Mechanic
Yes, you can replace a headlight by yourself at home with basic tools and a little patience. This guide walks you through every step of the headlight replacement process, from choosing the right bulb to aligning your new light. Save money on mechanic costs and get your headlights shining bright again in under an hour.
Key Takeaways
- DIY headlight replacement saves money: You can avoid expensive mechanic fees by doing it yourself.
- Basic tools are all you need: No special equipment required for most vehicles.
- Match your bulb type carefully: Halogen, LED, and xenon bulbs are not interchangeable.
- Safety first: Always disconnect the battery before starting any electrical work.
- Alignment matters: A poorly aligned headlight can blind other drivers and fail inspection.
- Know when to call a pro: Some vehicles have complex assemblies that make DIY difficult.
📑 Table of Contents
- Can I Replace a Headlight by Myself Without a Mechanic?
- Understanding Your Headlight System
- Tools and Materials You Will Need
- Step-by-Step Headlight Replacement Guide
- Common Mistakes to Avoid During Headlight Replacement
- When Should You Call a Professional?
- Tips for Maintaining Your Headlights
- How Headlight Replacement Compares to Other DIY Car Tasks
- Headlight Bulb Replacement Cost Comparison
- Final Thoughts on Replacing Your Headlight Yourself
Can I Replace a Headlight by Myself Without a Mechanic?
Headlights burn out. It happens to every driver at some point. And when it does, your first thought might be to book an appointment at the shop. But here is the good news: you can replace a headlight by yourself in most cases. You do not need to be a trained mechanic. You do not need expensive tools. All you need is a little know-how and about 30 to 60 minutes of your time.
Replacing a headlight bulb is one of the simplest DIY car repair jobs you can do. It is right up there with changing a windshield wiper or swapping out a dead battery. Once you learn how, you will never pay a shop to do it again. This guide covers everything from choosing the right bulb to aligning your new headlight for safe nighttime driving.
Whether your vehicle uses a standard halogen bulb or a modern LED assembly, the process is very similar. The key is knowing what to expect and taking your time. Rushing through a headlight replacement can lead to mistakes. But if you follow each step carefully, you will have a working headlight in no time.
Let us walk through the entire process together. By the end of this article, you will feel confident tackling this job on your own.
Understanding Your Headlight System
Before you start, it helps to understand what you are working with. Modern vehicles use different types of headlight systems. Each one has its own quirks. Knowing your setup makes the job much easier.
Types of Headlight Bulbs
Most cars on the road today use one of three bulb types:
- Halogen bulbs: These are the most common and affordable. They have been around for decades and are easy to replace. If your car is older or a basic model, it probably uses halogen.
- LED bulbs: Light Emitting Diode bulbs are brighter and last longer. They are becoming standard in newer vehicles. Replacing an LED bulb is slightly different from halogen.
- Xenon (HID) bulbs: High-Intensity Discharge bulbs produce a bright white light. They are common in luxury and performance vehicles. These require a bit more care during replacement.
Check your owner manual to confirm which type your vehicle uses. You can also look at the current bulb to see what kind it is. The type you need will determine what replacement bulb to buy.
How Headlights Are Mounted
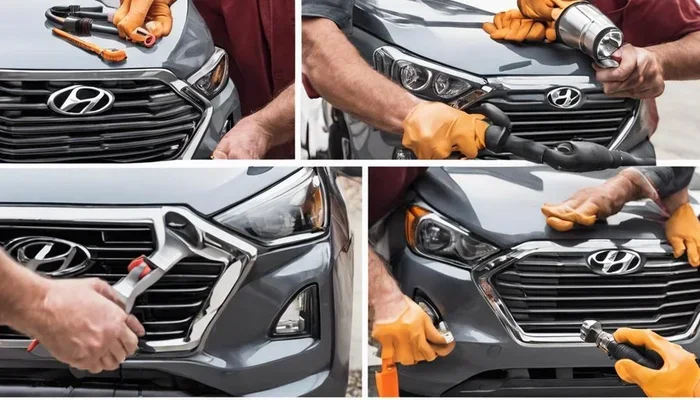
Headlights are held in place by a headlight assembly. This is the plastic or metal housing that surrounds the bulb. Some assemblies are easy to access from the engine bay. Others require you to work from behind the front grille. The mounting style varies by vehicle make and model.
Before you buy any parts, pop your hood and take a look. See how the headlight is secured. Are there screws? Clips? A wiring plug? Getting familiar with the setup beforehand saves you frustration later.
Tools and Materials You Will Need
One of the best things about headlight replacement is how few tools you need. You probably already have most of them in your garage or kitchen drawer.
Here is what you will need:
- The replacement bulb (match the exact part number from your manual)
- A clean cloth or gloves (oil from your skin can damage the new bulb)
- A screwdriver set (Phillips and flathead)
- A socket wrench set
- A flashlight or phone light
- Dielectric grease (optional, but helpful for protecting connections)
That is it. You do not need a professional automotive repair lift or special diagnostic equipment. This is a job you can do right in your driveway or garage.
Pro tip: Buy a bulb replacement kit. These kits include the bulb, gloves, and dielectric grease all in one package. They cost around $15 to $40 and make the job even easier.
Step-by-Step Headlight Replacement Guide
Now let us get into the actual work. Follow these steps in order and you will have a new headlight shining in no time.
Step 1: Prepare Your Vehicle
Start by turning off the engine and letting the car cool down. Headlights can get very hot while running. Wait at least 10 minutes before you touch anything. Next, disconnect the battery by removing the negative terminal. This prevents any electrical shorts while you work.
Open the hood and locate the back of the headlight assembly. You will see a wiring harness connected to the bulb socket. Take a photo of the setup with your phone before you do anything. This makes reassembly much easier.
Step 2: Remove the Old Bulb
Unplug the wiring harness from the bulb socket. Most connectors have a small tab you need to press. Gently pull the connector straight out. Do not yank on the wires themselves.
Next, remove the headlight housing cover if there is one. Some vehicles have a rubber cover that twists off. Others have screws holding a plastic cover in place. Use your screwdriver to remove any fasteners.
Now you can access the bulb itself. Most bulbs are held in by a spring-loaded metal clip. Press the clip inward and pull the bulb straight out. Be very gentle. Do not touch the glass part of the new bulb with your bare hands.
If you accidentally touch the glass, wipe it clean with rubbing alcohol and a lint-free cloth. Oils from your skin create hot spots on the bulb and can shorten its life significantly.
Step 3: Install the New Bulb
Take your new bulb out of the packaging using the gloves provided. Hold it by the base only. Insert the new bulb into the socket, making sure it sits securely. The alignment should match the old bulb exactly.
Reattach the spring clip to hold the bulb in place. Plug the wiring harness back in. Replace any covers or housing you removed earlier.
Before you close everything up, turn on the headlights to test the new bulb. Make sure both low beam and high beam work if applicable. If the bulb does not light up, double-check your wiring connection.
Step 4: Reassemble and Test
Once the new bulb works, reassemble everything in reverse order. Replace the housing cover, reconnect the battery, and close the hood. Then go outside and check both headlights. Make sure the new bulb matches the brightness of the other one.
If you notice one headlight is brighter than the other, you may need to adjust the headlight alignment. This is a simple process that involves adjusting screws on the assembly. We cover this in more detail below.
Common Mistakes to Avoid During Headlight Replacement
Even simple jobs come with pitfalls. Here are the most common mistakes people make when they replace a headlight by themselves:
- Touching the new bulb with bare hands: Skin oils damage the bulb surface. Always use gloves or a clean cloth.
- Buying the wrong bulb: Not all bulbs are the same. Check your vehicle manual or use an online lookup tool to find the exact part number.
- Forgetting to disconnect the battery: This can cause electrical shorts. Always remove the negative terminal first.
- Rushing the reassembly: Make sure every clip and screw is secure before you close the hood. A loose headlight can vibrate and eventually fail.
- Skipping the alignment check: A misaligned headlight can blind oncoming traffic and reduce your visibility. Always verify the beam pattern after installation.
Avoiding these simple mistakes will save you from headaches down the road. Take your time and do the job right the first time.
When Should You Call a Professional?
Most headlight replacements are straightforward. But some situations call for a professional touch. You should consider calling a mechanic if any of these apply to your vehicle.
First, if your headlight assembly is damaged, not just the bulb. Cracked housings or melted connectors need more than a bulb swap. Replacing an entire headlight assembly can be complex and may require special tools.
Second, if you have a newer vehicle with advanced lighting systems. Many modern cars use adaptive LED or matrix headlights. These systems involve sensors and computers. Replacing a bulb in these systems can be tricky. In some cases, the system needs to be recalibrated after a bulb change.
Third, if you are simply not comfortable working on your car. There is no shame in that. Not everyone enjoys DIY car repair. If you would rather leave it to the pros, go ahead and visit a shop.
One thing to keep in mind: some vehicles have headlight assemblies that are difficult to reach from the engine bay. For example, certain trucks and SUVs require you to work from the front bumper area. If you find the access too tight or confusing, it is okay to ask for help.
Also, if you have ever wondered whether a mechanic can hold your car until you pay, the answer is generally yes. But for a simple headlight job, you should not need to worry about that at all. This is a quick, affordable repair you can handle yourself.
Tips for Maintaining Your Headlights
Once you have replaced your headlight, you want it to last as long as possible. Regular car maintenance can extend the life of your headlights significantly.
Here are some easy tips:
- Clean your headlights regularly: Dirt and road grime build up on the lens and reduce brightness. Wipe them down with a mild cleaner every time you wash your car.
- Check both headlights often: Do not wait for one to burn out. Periodically test both low and high beams to catch issues early.
- Replace bulbs in pairs: If one headlight goes out, consider replacing both at the same time. This ensures even brightness on both sides and prevents the second bulb from failing soon after.
- Use dielectric grease on connections: This protects the wiring from moisture and corrosion. It is a small step that makes a big difference.
- Address condensation quickly: If you notice moisture inside the headlight housing, check the seal. A broken seal can cause water damage to the bulb and socket.
These simple habits keep your headlights performing at their best. They also improve your safety on the road, especially during nighttime driving or bad weather.
For other DIY vehicle tasks, you might enjoy learning about projects like whether you can add Homelink to a vehicle. Many of these jobs follow the same principle: with the right guidance, most drivers can handle them without professional help.
How Headlight Replacement Compares to Other DIY Car Tasks
Replacing a headlight is one of the easiest electrical jobs you can do on a vehicle. To put it in perspective, here is how it compares to other common DIY car repair tasks:
- Headlight bulb swap: Very easy. Takes 20 to 60 minutes. Requires basic tools.
- Windshield wiper replacement: Very easy. Takes 5 to 10 minutes. No tools needed.
- Battery replacement: Easy. Takes 15 to 30 minutes. Requires wrench.
- Spark plug replacement: Moderate. Takes 30 to 90 minutes. Requires socket set.
- Brake pad replacement: Moderate to hard. Takes 1 to 3 hours. Requires jack and tools.
As you can see, headlight replacement falls on the easier end of the spectrum. It is a great first project if you are new to working on your own car. Once you complete it successfully, you will build confidence for bigger jobs like car maintenance and basic repairs.
Some people also ask about related electrical tasks. For instance, if you have a hybrid vehicle, you might wonder if you can jump start a hybrid. The answer is yes, with some precautions. Hybrids have both a high-voltage battery and a standard 12-volt battery, so the process is a bit different. But the principle of doing it yourself is the same.
Headlight Bulb Replacement Cost Comparison
One of the biggest reasons people choose to replace a headlight by themselves is to save money. Let us look at how the costs compare:
| Option | Cost Range | Time Required |
|---|---|---|
| DIY headlight replacement | $15 to $50 (bulb only) | 30 to 60 minutes |
| Mechanic shop replacement | $75 to $200 (bulb + labor) | 1 to 2 hours |
| Dealership replacement | $100 to $300 (bulb + labor) | 1 to 2 hours |
As you can see, the savings from doing it yourself can be significant. Even if you buy a quality bulb and a replacement kit, you still spend less than half of what a shop would charge. And you get the satisfaction of doing it yourself.
Keep in mind that prices vary based on your vehicle and the type of bulb you need. Luxury vehicles with xenon or matrix LED headlights may cost more for replacement bulbs. But the DIY approach still saves you money compared to professional labor.
Final Thoughts on Replacing Your Headlight Yourself
Replacing a headlight by yourself is one of the most rewarding DIY car repairs you can do. It is simple, fast, and saves you real money. You do not need years of experience or a garage full of tools. All you need is the right bulb, a few basic tools, and the confidence to get started.
Start by identifying your bulb type and gathering your materials. Follow each step carefully and do not rush. Test the new bulb before you finish reassembling everything. And if something does not feel right, it is perfectly fine to ask a friend for help or visit a local shop.
The skills you build from this job carry over to other car maintenance tasks. Every successful repair makes you a more confident driver and vehicle owner. So grab your replacement bulb, pop your hood, and get to work. Your headlights and your wallet will thank you.
Remember, the goal of DIY car repair is not just to save money. It is to understand your vehicle better and take pride in keeping it running well. A simple headlight replacement is the perfect place to start that journey.
Frequently Asked Questions
How long does it take to replace a headlight bulb by yourself?
Most people complete a headlight bulb replacement in 30 to 60 minutes. The exact time depends on your vehicle model and how easily you can access the back of the headlight assembly. Newer vehicles with tight engine bays may take a bit longer.
Can I use a different brand of headlight bulb than what came with my car?
Yes, you can use a different brand as long as the bulb matches the correct part number and type. Check your owner manual for the exact specifications. Popular brands like Philips and Sylvania offer high-quality replacements that often outperform the original.
Do I need to reset anything after replacing a headlight bulb?
In most vehicles, no reset is needed. However, some modern cars with computer systems may display a warning message after a bulb change. This usually clears itself after a few driving cycles. If it does not, a simple battery disconnect for a few minutes often resets the system.
Is it safe to drive with a burned-out headlight?
It is not safe and may be illegal. Driving with a burned-out headlight reduces your visibility and makes your vehicle harder for other drivers to see. Replace the bulb as soon as possible to stay safe on the road.
How often should headlight bulbs be replaced?
Most headlight bulbs last between 500 and 1,000 hours of use. For the average driver, this means replacement every 2 to 3 years. LED bulbs tend to last much longer, sometimes up to 10,000 hours or more.
What should I do if the new headlight bulb does not work?
First, double-check that the bulb is properly seated in the socket. Make sure the wiring harness is fully connected. If the bulb still does not work, the issue may be a blown fuse or a faulty wiring connection. Check your fuse box and replace any blown fuses related to the headlights.
=== CONCLUSION ===
Replacing a headlight by yourself is easier than most people think. With the right bulb, basic tools, and this step-by-step guide, you can handle the job in under an hour. You will save money, learn a valuable skill, and keep your vehicle safe for nighttime driving. Do not hesitate to try it. You might be surprised at how capable you are. Headlight replacement is just the beginning of your DIY car repair journey.