How to Remove Film From the Inside of a Car Windshield
A hazy film on the inside of your car windshield is a common problem that reduces visibility and makes night driving dangerous. This guide covers every effective method to remove interior windshield film, from household solutions like vinegar and baking soda to professional-grade products. You will learn what causes the buildup, how to prevent it from returning, and step-by-step instructions for a crystal-clear windshield.
Have you ever looked through your car windshield and noticed a stubborn, greasy haze clinging to the inside surface? You are not alone. This film on the inside of a car windshield is one of the most frustrating problems drivers face. It builds up slowly, and before you know it, your visibility suffers, especially at night or during rain.
The good news is that removing this film is entirely doable. You do not need expensive equipment or a trip to the mechanic. With the right windshield cleaning techniques and a little elbow grease, you can restore crystal-clear visibility in under an hour. This guide walks you through every method, from simple home remedies to professional-grade solutions.
We will also cover what causes this buildup in the first place. Understanding the root cause helps you prevent the problem from returning. Whether your windshield looks slightly cloudy or completely hazy, you will find the solution here.
Let us dive in and get your car windshield looking brand new again.
Key Takeaways
- Heat and plastic outgassing are the main culprits behind sticky film buildup on car windshields.
- Household items like vinegar, baking soda, and dish soap can effectively remove light to moderate film.
- Commercial glass cleaners designed for automotive use offer stronger cleaning power for stubborn haze.
- Microfiber cloths and razor blades are essential tools for achieving a streak-free finish.
- Preventive measures like sunshades and regular cleaning keep your windshield film-free for longer.
- Professional detailing is a great option if DIY methods fail to restore clarity.
📑 Table of Contents
- What Causes Film Buildup on the Inside of a Car Windshield
- How to Remove Film From Inside a Car Windshield
- Tools and Supplies You Will Need
- Step-by-Step Cleaning Process
- Preventing Future Film Buildup
- When to Seek Professional Help
- Comparison of Cleaning Methods
- Common Mistakes to Avoid
- Final Thoughts
What Causes Film Buildup on the Inside of a Car Windshield
Before you start cleaning, it helps to understand what you are dealing with. Interior windshield haze does not appear out of nowhere. Several factors combine to create that sticky, greasy layer on your glass.
Outgassing from Dashboard and Interior Plastics
Your car’s interior is full of plastic components. The dashboard, console, door panels, and even seat covers release tiny molecules of volatile organic compounds. This process is called outgassing. Over time, these plastic vapors settle on the windshield and form a thin, sticky film. This is especially common in newer cars or vehicles with lots of plastic trim.
Heat and Sun Exposure
Heat accelerates outgassing significantly. When your car sits in direct sunlight, the interior temperature can soar past 150 degrees Fahrenheit. This causes plastics to release more vapors at a faster rate. The vapors then condense on the cooler glass surface, creating that hazy windshield film buildup you notice.
Off-Gassing from Car Accessories
Phone mounts, air fresheners, dash mats, and seat covers can all contribute to the problem. These products contain chemicals that slowly evaporate and deposit residue on your windshield. Even the adhesive from stickers or gauges can leave behind a cloudy layer over time.
Dust, Smoke, and Indoor Pollutants
If you smoke inside your car, tar and nicotine will coat the windshield. Even without smoking, everyday dust, skin cells, and aerosol sprays settle on the glass. Over months and years, these particles bond with the plastic vapors to create a tough, greasy film that normal wiping cannot remove.
Poor Ventilation
Cars that lack proper ventilation trap these vapors inside the cabin. When the air has nowhere to go, the pollutants have more contact with the windshield surface. This is why cars parked in garages or driven in stop-and-go traffic tend to develop film faster.
How to Remove Film From Inside a Car Windshield
Now that you know what causes the film, let us talk about how to remove it. There are several methods you can try, ranging from gentle household solutions to more heavy-duty approaches. Start with the simplest method and move to stronger solutions only if needed.
Method 1: Vinegar and Water Solution
White distilled vinegar is one of the most effective and affordable car windshield cleaning solutions. It cuts through grease and dissolves light film without damaging your glass.
Here is how to do it:
- Mix equal parts white vinegar and distilled water in a spray bottle.
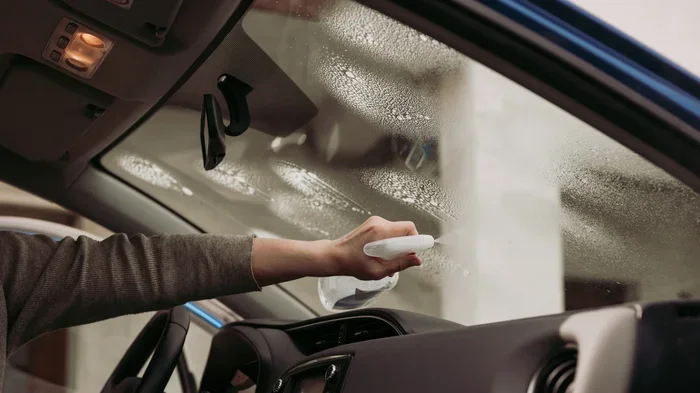
- Spray the solution generously onto the inside of the windshield.
- Let it sit for three to five minutes to loosen the film.
- Wipe aggressively with a clean microfiber cloth, using circular motions.
- Flip the cloth frequently to avoid reapplying grime.
- Buff dry with a second clean microfiber cloth.
This method works well for light to moderate film. You may need to repeat the process for heavier buildup.
Method 2: Baking Soda Paste
Baking soda is a mild abrasive that can scrub away tougher film without scratching glass. It is a great next step if the vinegar method does not fully clear the haze.
Follow these steps:
- Mix three tablespoons of baking soda with one tablespoon of water to form a paste.
- Apply the paste directly to the affected areas of the windshield.
- Let it sit for two to three minutes.
- Scrub gently with a damp microfiber cloth in circular motions.
- Rinse with clean water and wipe dry thoroughly.
Quick Tip: Do not let the baking soda paste dry on the glass. This can leave a residue that is harder to remove than the original film.
Method 3: Dish Soap and Ammonia Solution
For stubborn film that refuses to budge, a stronger cleaning solution may be necessary. A mix of dish soap and a small amount of ammonia tackles heavy windshield haze removal effectively.
Here is what to do:
- Add one teaspoon of dish soap and one tablespoon of ammonia to a gallon of warm water.
- Dip a microfiber cloth into the solution and wring it out well.
- Wipe the windshield in sections, applying firm pressure.
- Rinse with clean water and dry completely with a fresh cloth.
Important: Always wear gloves when using ammonia. Work in a well-ventilated area. Never mix ammonia with bleach or other cleaning products.
Method 4: Commercial Automotive Glass Cleaners
If you prefer a product specifically designed for this job, several automotive glass cleaners on the market are formulated to tackle interior windshield film. Look for products that mention film removal or haze clearing on the label.
Some popular options include:
- Rain-X Interior Glass Cleaner — designed specifically for interior windshield surfaces.
- SG Interior Cleaner — a favorite among car detailers for removing stubborn film.
- 303 Interior Clean — a gentle but effective cleaner safe for all interior glass.
Follow the product instructions carefully. Most require spraying onto a cloth rather than directly onto the glass to prevent overspray on your dashboard.
Method 5: Razor Blade or Glass Scraper
For the most stubborn film, a razor blade cleaning technique can work wonders. This method is highly effective but requires care to avoid scratching the glass.
Here is how to do it safely:
- Soak the windshield with your chosen cleaning solution (vinegar, ammonia mix, or commercial cleaner).
- Hold a new razor blade or glass scraper at a 30-degree angle against the glass.
- Apply gentle, even pressure and scrape in slow, overlapping strokes.
- Keep the blade flat against the surface to avoid gouging.
- Wipe away residue frequently and rinse the blade.
- Finish by polishing the glass with a clean microfiber cloth.
Common Mistakes: Never scrape a dry windshield. Always keep the surface wet. Also, avoid using a dull or chipped blade, as this increases the risk of scratches.
Tools and Supplies You Will Need
Gathering the right tools before you start makes the job faster and more effective. Here is a checklist of supplies for interior windshield cleaning:
- Microfiber cloths — get at least three or four. They are lint-free and gentle on glass.
- Spray bottle — for mixing and applying your cleaning solution.
- Distilled water — tap water contains minerals that can leave streaks.
- White distilled vinegar — an affordable and powerful cleaning agent.
- Baking soda — for moderate to heavy film removal.
- Ammonia — for the toughest buildup (use with caution).
- Razor blade or glass scraper — for stubborn, hardened film.
- Automotive glass cleaner — a commercial option for convenience.
- Rubber gloves — to protect your hands from chemicals.
- Bucket of warm water — for rinsing and dampening cloths.
Having everything ready before you start means you will not need to stop mid-cleaning to find a missing supply. This keeps your momentum going and ensures a thorough job.
Step-by-Step Cleaning Process
Follow this detailed process for the best results. Whether you choose the vinegar method or the ammonia solution, the general workflow remains the same.
Step 1: Park in the Shade
Never clean your windshield in direct sunlight. The heat causes cleaning solutions to evaporate too quickly, leaving streaks and residue. Park in a shaded area or work in a garage if possible.
Step 2: Remove Loose Debris
Start by dusting the windshield with a dry microfiber cloth. This removes loose particles that could scratch the glass during the wet cleaning phase.
Step 3: Apply Your Cleaning Solution
Choose your preferred method from the options above. Spray or apply the solution generously across the entire windshield. Let it sit for the recommended time to break down the film.
Step 4: Scrub Thoroughly
Using firm, circular motions, work the solution into the film. Cover the entire windshield surface. Do not rush this step — thorough scrubbing is what separates a good result from a great one.
Step 5: Rinse and Wipe
Use a clean, damp cloth to remove all cleaning residue. Then dry the windshield completely with a fresh microfiber cloth. Any remaining moisture can leave water spots or streaks.
Step 6: Inspect and Repeat
Hold the windshield up to the light and check for any remaining haze. If you still see film, repeat the process. Heavy buildup may require two or three rounds to fully clear.
Preventing Future Film Buildup
Cleaning your windshield is only half the battle. The real challenge is keeping it film-free over time. Once you have restored clarity, take these steps to prevent the haze from returning.
Use a Windshield Sunshade
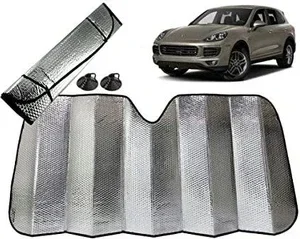
Parking in direct sunlight is the biggest driver of interior film buildup. A car windshield sunshade blocks UV rays and keeps your interior temperature much lower. This alone can dramatically slow down outgassing and film formation.
Ventilate Your Car
Crack your windows slightly when parking to allow vapors to escape. Better yet, leave your sunroof or rear windows slightly open on warm days. This simple habit reduces the amount of plastic vapors that settle on your windshield.
Clean Regularly
Make interior windshield cleaning part of your regular car wash routine. A quick wipe-down every two weeks with a microfiber cloth and a light glass cleaner prevents film from accumulating to problematic levels.
Avoid Cheap Dashboard Products
Budget dashboard wipes and air fresheners often contain heavy chemicals that contribute to film buildup. Invest in high-quality, low-VOC products for your interior. Your windshield will thank you.
Keep a Microfiber Cloth in Your Car
Wiping down your windshield after long drives removes dust and skin oils before they bond with plastic vapors. This quick habit goes a long way toward maintaining clarity.
When to Seek Professional Help
Most interior windshield film can be removed at home with the methods described above. However, some situations call for professional assistance. If you have tried multiple methods and still see persistent haze, a professional car detailing service may be your best option.
Professional detailers have access to industrial-grade automotive glass cleaning products and tools that are not available to consumers. They also have the experience to tackle heavy buildup without risking damage to your glass or interior trim.
The cost of a professional interior detail typically ranges from $50 to $150 depending on your location and the level of service. This is a reasonable investment if DIY methods have not worked for you.
Expert Insight: According to professional detailers, the most effective technique for heavy film removal is a combination of ammonia-based cleaning followed by a razor blade pass. This two-step process clears even the most stubborn buildup in a single session.
Comparison of Cleaning Methods
Not all windshield film removal methods are created equal. Here is a quick comparison to help you choose the right approach for your situation.
| Method | Effectiveness | Cost | Difficulty | Best For |
|---|---|---|---|---|
| Vinegar and Water | Light film | Very Low | Easy | Regular maintenance |
| Baking Soda Paste | Moderate film | Very Low | Easy | Sticky residue |
| Dish Soap and Ammonia | Heavy film | Low | Medium | Stubborn haze |
| Commercial Glass Cleaner | Moderate to Heavy | Medium | Easy | Convenience and routine use |
| Razor Blade Scraper | All levels | Low | Advanced | Hardened or thick film |
| Professional Detailing | Complete removal | High | None | Severe or recurring buildup |
Choose the method that matches the severity of your film problem. You can also combine methods for the best results. For example, start with vinegar, follow up with baking soda, and finish with a razor blade pass for a perfectly clear windshield.
Common Mistakes to Avoid
Even with the best intentions, people often make mistakes that reduce the effectiveness of their cleaning efforts. Here are the most common errors to avoid:
- Using paper towels or regular cloths — These leave lint and fibers behind. Always use microfiber cloths for streak-free results.
- Spraying cleaner directly onto the glass — Overspray can reach your dashboard and interior trim, causing damage or discoloration. Always spray onto the cloth first.
- Skipping the rinse step — Residual cleaning solution can leave a film of its own. Always rinse and dry thoroughly.
- Using too much pressure with a razor blade — Let the blade do the work. Excessive force can scratch the glass or damage the windshield seal.
- Cleaning in direct sunlight — Heat causes solutions to dry too fast, leaving streaks and reducing cleaning effectiveness.
- Neglecting preventive measures — Cleaning once will not fix the problem if you do not address the root causes of film buildup.
Final Thoughts
A clear windshield is essential for safe driving. It improves your visibility, reduces eye strain, and makes night driving significantly safer. Removing film from the inside of your car windshield is a simple task that anyone can do with the right supplies and a little patience.
Start with the gentlest method and work your way up to stronger solutions if needed. The vinegar and water method is a great first step for most drivers. For heavier buildup, the ammonia solution or razor blade technique will deliver outstanding results.
Remember that prevention is just as important as cleaning. Use a sunshade, ventilate your car, and clean your windshield regularly. These habits will keep your glass clear and your driving experience safe and enjoyable.
Now that you have all the knowledge and tools you need, there is no reason to drive with a hazy windshield another day. Grab your supplies, follow the steps in this guide, and enjoy the crystal-clear view through your clean car windshield.
Frequently Asked Questions
Can I use Windex to clean the inside of my car windshield?
Yes, Windex works for light film removal, but it may not be strong enough for heavy buildup. Avoid Windex formulas that contain ammonia if you have tinted windows, as ammonia can degrade tint adhesive over time. Stick to ammonia-free formulas for tinted vehicles.
How often should I clean the inside of my car windshield?
Cleaning the inside of your windshield every two to four weeks is ideal for preventing film buildup. If you park in direct sunlight frequently or drive in dusty conditions, you may need to clean more often. Regular maintenance makes each cleaning session faster and easier.
Will a razor blade scratch my car windshield?
When used correctly with the glass wet and at a low angle, a razor blade will not scratch glass. Always use a brand-new, sharp blade and apply gentle pressure. Never scrape a dry windshield, as this dramatically increases the risk of scratches.
What is the best cloth for cleaning a car windshield?
Microfiber cloths are the best choice for cleaning car windshields. They are lint-free, absorbent, and gentle on glass surfaces. Avoid paper towels, old t-shirts, or regular rags, as these leave fibers and can cause streaks.
Can I prevent film buildup on my windshield entirely?
You cannot prevent it completely, since outgassing from interior plastics is a natural process. However, using a sunshade, ventilating your car, and cleaning regularly can reduce film buildup to a minimum. These preventive habits make cleaning sessions quick and effortless.
Is interior windshield film harmful to my health?
The film itself is not directly harmful, but the pollutants and plastic vapors that cause it can reduce your air quality inside the car. If you notice a persistent chemical smell alongside the haze, it is a sign that your cabin air quality may need attention. Regular cleaning and ventilation help address this concern.
=== CONCLUSION ===
Removing film from the inside of your car windshield is easier than most people think. Whether you choose a simple vinegar solution or a more powerful ammonia mix, the key is to act before the buildup becomes too thick. Regular cleaning and smart preventive habits keep your windshield clear and your driving safe.
Start today. Pick one of the methods from this guide, gather your supplies, and give your windshield the care it deserves. A clean, clear windshield makes every drive better — and it only takes about 30 minutes of your time.